• You are currently viewing our boards as a guest which gives you limited access to view most discussions and access our other features. By joining our free community you will see less advertisements, have access to post topics, communicate privately with other members (PM), respond to polls, upload content and access many other special features. Registration is fast, simple and absolutely free so please, join our community today!

    If you have any problems with the registration process or your account login, please contact us.

Header Removal and Key Question

Buellxb Forum

Help Support Buellxb Forum:

UPBuell

Active member
Joined
May 26, 2010
Messages
35
XB12R Questions:

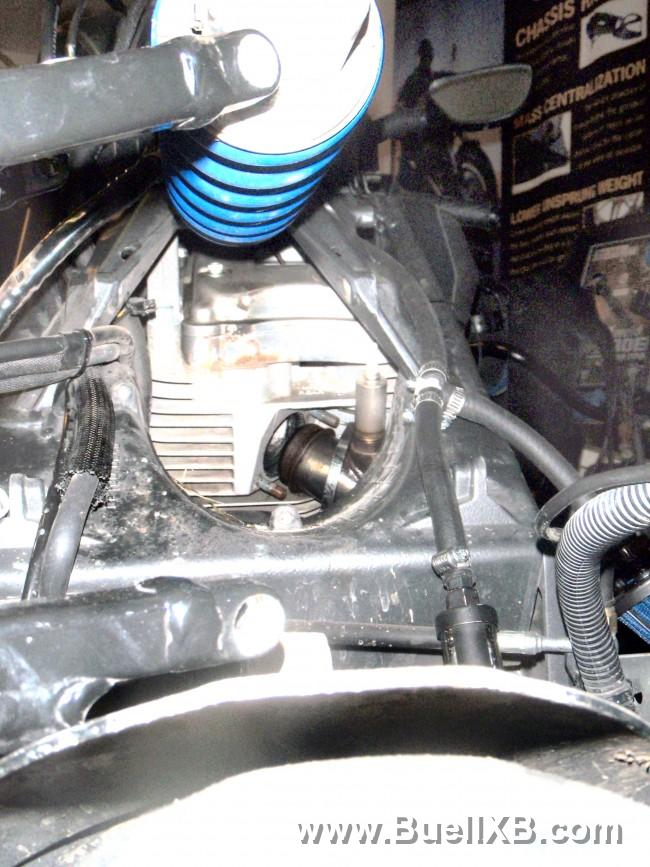
Had a free 30 minutes tonight so I tried removing my headers. I am sure many of you know 3 of the 4 bolts holding the header, no problem, whats the magic trick for the 4th bolt?

In the process of removing the headers, I thought it would be best to remove rear plastic. And bam my key broke in the rear seat "releaser thingy". SO can keys be purchased with a VIN through dealers?

Thanks,

JD
 
header removal - the cheatin' easy way

first off: days in advance, soak down your header stud nuts with PBlaster, or your preferred penetrating oil. snapping a stud is no-fun.

1. Remove the chin fairing and muffler.
2. Remove the left and right side air scoops
3. Remove the engine cradle bolts so you can move it to the side (this is the
sub-frame in front that holds onto the engine and oil cooler). Don't take
it off -just let it hang there.
4. Remove the seat.
5. Loosen -but do not remove- the rear shock upper and lower bolts. Use a small diameter pipe on the hex
key end to gain leverage. Loosen only at this time.
6. Loosen -but do not remove- the front header tube-to-cylinder head nuts.
7. stabilize the bike.
(if you don't have a lift, improvise but keep the bike from falling over).
8. Remove the rear shock upper and lower bolts. Remove the shock but just
lay it on the 'seat' area, out of the way.
9. Remove the fan and front screen -unplug the connector by pushing the
little tab(s) in so the lock won't bind when removing it.
10. Pull the fan back, you might have to tilt and rock it but it comes out
thru the back.
11. Using a 7/8" wrench, remove the O2 sensor -remember to
unplug the wire connector.
12. Remove the rear header tube-to-cylinder head nuts. a universal socket or joint would come in handy on this one.
13. Remove the front header tube nuts (you loosened them previously).
14. Now comes the fun part. Pull the front tube outwards -slowly- and
carefully rotate the header collector (big end) towards you and up.
Rotate the whole thing to the rear of the bike and slowly pull it outwards.
The trick is, the header won't just come straight down and out. You have to
'unscrew it' counter-clockwise so it should be upside down by the time it finally
clears the engine and frame.
15. If you want to replace the exhaust gaskets, now is the time. Look at the ones on the motor. Then, decide if it's worth
your time to try to remove them and install the new ones. Chances are, your
old ones are fine.
16. Installation is the reverse of these steps. please don't Call me if you get stuck or
have any questions.
 
yes, you should be able to order a new key with the VIN provided. or one of the volvo keys is teh same pattern, just needs to be cut. i haven't had luck with this. homedepot and lowes didn't have the match. the hardware store had one that was close, but they cut it way bad. not even symetrical.
 
or you could just rotate teh motor like the service manual says. both will work. not sure wich is easier/better/faster/right/wrong, but let me tell you THE ONLY WAY to skin a cat ... ...
 
HOW-TO-REMOVE-HEADER-NO-ENGINE-ROTATE-NEEDED-with-pics
see steps 1 - 10 to remove header bolts then the rest of the steps to remove header.

or you can use 1/4 rachet
13mm short socket, 10 mm sockets
1/4 universeral (elbow) joint
1/4 extensions 6inches, and 2 inches long
to snake around header for short cut to remove the header bolts, but the other way above & on my thread is easier since your going to remove the header anyways.


1714_20100401000121_L.jpg
 
Wow, my bestie who is a buell mechanic told me you need to drop the engine to remove header. I'll ask him if this is ok to do.
 
thats because the way the manuals says to do it is to Rotate engine thats why he says that.

did you read the whole thing?

but there is always more than ONE way to skin a cat,

but it's faster for most to have the engine rotated down to put header back on.

plus the manuals are for tech to be able to get it done in the fasted or certain amount of time . and to rotate the engine is for the tech not to damage the header or scratch up the inside of the frame , the techs might not be patient enough to take the time getting it off or back on or lack of common sense,
plus it allows them to charge you out the @$$ for labor to rotate engine and such.
 
and because that was at the time of service manual publication it was the latest field tested & factory approved major repair methods for the buell techs.
 
All done

More work than I expected
But
i followed the instructions and I'm now re assembled and back on the road
We'll see how long the weld holds20230410_153805.jpg20230415_064657.jpg

HOW-TO-REMOVE-HEADER-NO-ENGINE-ROTATE-NEEDED-with-pics
see steps 1 - 10 to remove header bolts then the rest of the steps to remove header

or you can use 1/4 rachet
13mm short socket, 10 mm sockets
1/4 universeral (elbow) joint
1/4 extensions 6inches, and 2 inches long
to snake around header for short cut to remove the header bolts, but the other way above & on my thread is easier since your going to remove the header anyways.


1714_20100401000121_L.jpg
 
The weld will hold just fine if you used stainless filler rod and back purged with shield gas. Otherwise it will be brittle on the inside (and rust too).
 
A welder with experience with stainless, should be able to weld it just fine. Make sure they use (304) filler rod and also fill the inside of the tube with shielding gas. This will prevent the weld from become brittle on the inside and prevent corrosion.
 
Back
Top