[cool]
I suppose this is first in a series of write-ups that are going to let everyone know what I have done to an unharmed, totally stock, 2005 XB12R that started with 5k miles or so. This is how I put an sTT swing arm on my 05. It works with putting any 06+ swing arm on any 05- frame.
First. I got an sTT/Uly swing arm, oil lines, belt, and the rest of the parts associated with it (belt guard, axle, etc.) With the bike standing straight up, I measured the distance from the floor/ground to the a point on the frame to know the ride height. I wanted to keep the frame in it's stock position as not to effect the steering angles.

Obviously I took the swing arm off of my bike.
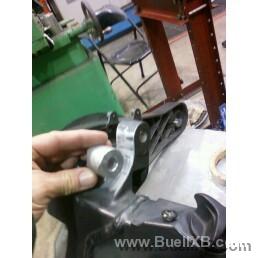
With the longer swing arm in place, and bolted in, I began to check suspension travel. The bike should be jacked up by the muffler to stock ride height. If you compare the two swing arms, the shock bung is located quite differently on the 05. I had a new piece welded to the swing arm to match the geometry of the 05 swing arm as close as possible.

Then I had it welded. Word of caution here: I have met people that can weld, and then I have met people that CAN WELD! This is a job left for the CAN WELD crew. Remember this is an aluminum casting. If you don't know what you are doing, you will end up with a brittle piece of trash. I took it to Fox Lake Propeller in Spring Grove, IL. Best welder I have ever met. Good friend too.

Now put your shock on......

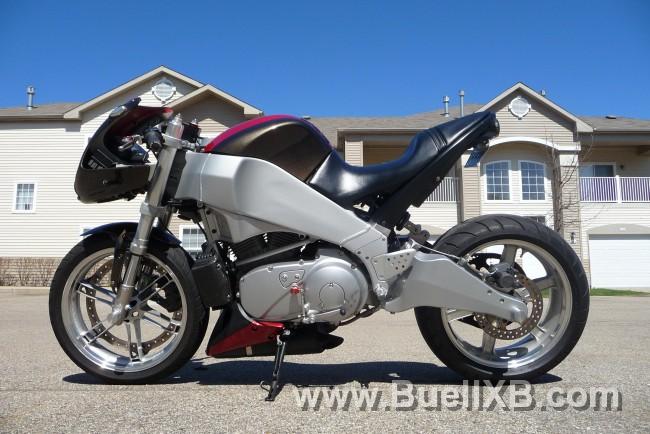
Heres how it now sits.

Now the unexpected easy part, the oil lines. If you have an 05 or older, and you know your oil lines; then you know where they are run. Right between the muffler and the bottom of the motor. If you are familiar with the 06 and up, they have a new routing, and, what I believe to be a better design. With the swing arm in place, I started messing with the oil lines. The confusion took place in the service manual differences. In my 05 manual, the lines are as follows: (1) vent line (2) feed line (3) return line.
In the 06 and up manuals, two of the numbers are switched. I dont recall which ones are switched but the solution is simple. There have been a few upgrades in oil pumps throughout the XB years, and all of the newer ones can go into OLDER XB models to take advantage of the larger scavenging gerotor in the newer design. If the principal design of the pump did not change, the the oil lines go to the same places. Two were not flipped when the pumps/systems were updated. So, I now have 06+ lines on my 05, which run the supply and vent lines up by the front belt sprocket.

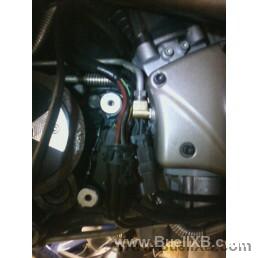
I had to drill and tap a 1/4-28 hole under the idler pulley to hold the return oil line in place. The newer model XB bikes have some material added in the casting to provide for this. Mine does not. I drilled into the boss for the lowest idler pulley stud. I drilled until I touched the stud, then tapped as deep as I could go. I got enough threads for a 3/8 long screw to hold the loop. If it ever strips out, I will heli-coil it.

The only other part of the oil lines that needed attention was the vent line to the cam cover. The newer ones thread directly into the cover, but the older (05-) had a little stainless npt-flare 90 degree fitting. The new oil lines have a bigger fitting. I just went to Napa, and bought a fitting that fit, and replaced the other one. The new one was brass, so I polished it while it was there.

The last problem to tackle, is that with the new oil line routing, there is an extra line in the No.77 connector area. My 05 cover wont fit anymore. I could get an 06+ cover.......but........I don't do well with idle time.

Theres a couple more pieces welded to the frame part of the cover, but thats my next write-up. Soon to come: ProTapers on an R with new risers (I still have to find Lightning throttle cables, and brake line to finish that one). I'll do one of the pulley cover too. Cheers Y'all!!!!!
I suppose this is first in a series of write-ups that are going to let everyone know what I have done to an unharmed, totally stock, 2005 XB12R that started with 5k miles or so. This is how I put an sTT swing arm on my 05. It works with putting any 06+ swing arm on any 05- frame.
First. I got an sTT/Uly swing arm, oil lines, belt, and the rest of the parts associated with it (belt guard, axle, etc.) With the bike standing straight up, I measured the distance from the floor/ground to the a point on the frame to know the ride height. I wanted to keep the frame in it's stock position as not to effect the steering angles.

Obviously I took the swing arm off of my bike.
With the longer swing arm in place, and bolted in, I began to check suspension travel. The bike should be jacked up by the muffler to stock ride height. If you compare the two swing arms, the shock bung is located quite differently on the 05. I had a new piece welded to the swing arm to match the geometry of the 05 swing arm as close as possible.

Then I had it welded. Word of caution here: I have met people that can weld, and then I have met people that CAN WELD! This is a job left for the CAN WELD crew. Remember this is an aluminum casting. If you don't know what you are doing, you will end up with a brittle piece of trash. I took it to Fox Lake Propeller in Spring Grove, IL. Best welder I have ever met. Good friend too.

Now put your shock on......

Heres how it now sits.

Now the unexpected easy part, the oil lines. If you have an 05 or older, and you know your oil lines; then you know where they are run. Right between the muffler and the bottom of the motor. If you are familiar with the 06 and up, they have a new routing, and, what I believe to be a better design. With the swing arm in place, I started messing with the oil lines. The confusion took place in the service manual differences. In my 05 manual, the lines are as follows: (1) vent line (2) feed line (3) return line.
In the 06 and up manuals, two of the numbers are switched. I dont recall which ones are switched but the solution is simple. There have been a few upgrades in oil pumps throughout the XB years, and all of the newer ones can go into OLDER XB models to take advantage of the larger scavenging gerotor in the newer design. If the principal design of the pump did not change, the the oil lines go to the same places. Two were not flipped when the pumps/systems were updated. So, I now have 06+ lines on my 05, which run the supply and vent lines up by the front belt sprocket.

I had to drill and tap a 1/4-28 hole under the idler pulley to hold the return oil line in place. The newer model XB bikes have some material added in the casting to provide for this. Mine does not. I drilled into the boss for the lowest idler pulley stud. I drilled until I touched the stud, then tapped as deep as I could go. I got enough threads for a 3/8 long screw to hold the loop. If it ever strips out, I will heli-coil it.

The only other part of the oil lines that needed attention was the vent line to the cam cover. The newer ones thread directly into the cover, but the older (05-) had a little stainless npt-flare 90 degree fitting. The new oil lines have a bigger fitting. I just went to Napa, and bought a fitting that fit, and replaced the other one. The new one was brass, so I polished it while it was there.

The last problem to tackle, is that with the new oil line routing, there is an extra line in the No.77 connector area. My 05 cover wont fit anymore. I could get an 06+ cover.......but........I don't do well with idle time.

Theres a couple more pieces welded to the frame part of the cover, but thats my next write-up. Soon to come: ProTapers on an R with new risers (I still have to find Lightning throttle cables, and brake line to finish that one). I'll do one of the pulley cover too. Cheers Y'all!!!!!

