Firebolt handlebar risers installed:Pics

Buellxb Forum

Help Support Buellxb Forum:

FOURTYGRIT

Active member
Joined
Apr 28, 2010
Messages
42
I finished installing these bar risers last night on my XB12R. A few others on this forum were curious and wanted to see photos of the install as well as possible problem areas.I purchased the bars from Americansportbike.Al's a great guy and very helpful as I'm sure you all know. They are riser bars for the 1125R though they do fit the firebolt with minor modifications. I'll do my best to discuss these mods with the photo attachments to follow. Let me know what you guys think, and I'll give you updates as I get some riding time in.(it's raining here).

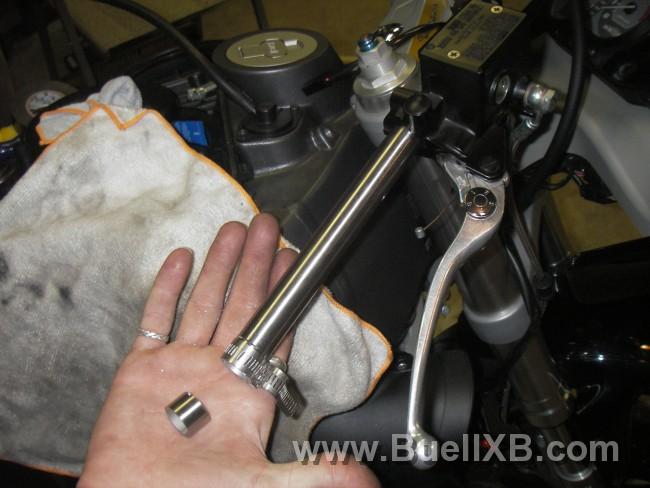
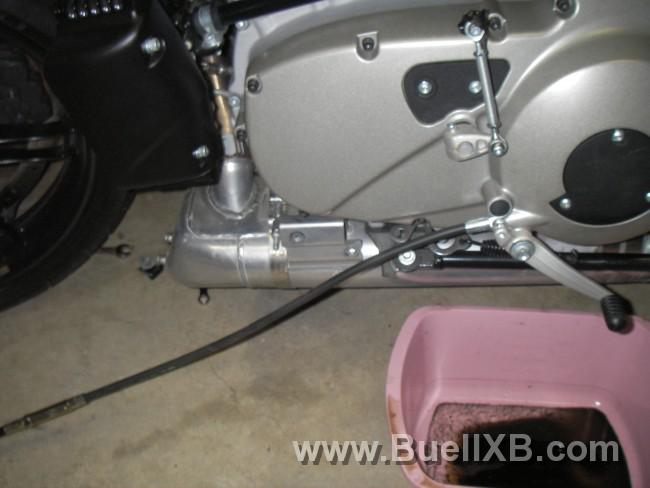
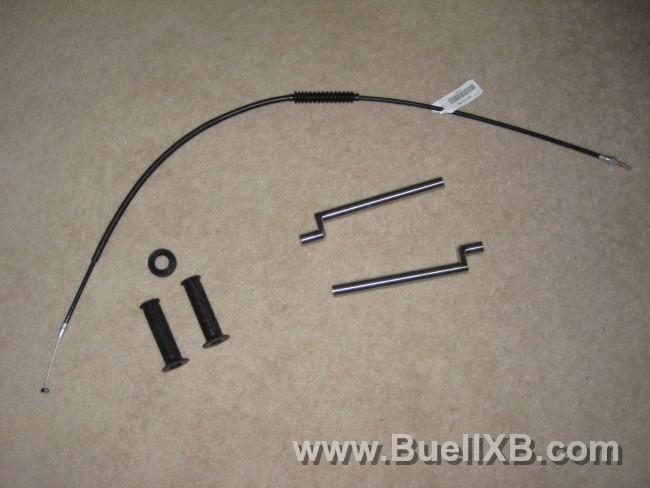
here are the items needed, Lightning clutch cable, new grips(though optional as I found out) and the bars.
6727_20100601101712_L.jpg
 
Step 1: There was no need to remove the fairing, I was glad about that,I removed the grips. On the clutch side I carefully slid a screw driver between the bar and grip while spraying a little WD40 in the gap. The grip came right off intact.(Someone's idea from this forum)Thanks fellas....
6727_20100601102528_L.jpg
 
Step 2:Loosen the clutch cable adjuster completely, then Loosen the clutch and turn signal housing on the bar and remove the bolt from the end of the bar at the clip on and carefully slide the bar out. This also allows for easy release of the ferrule from the clutch bracket.
6727_20100601102704_L.jpg
 
Step 3: At this point the clutch cable should be free from the lever.(See next photo for clutch release mechanism before proceeding)
I know that it's very possible to have problems with replacing the clutch cable. I've read many horror stories from those much wiser than myself on this site. So needless to say, I took my time and very carefully removed the old clutch cable from the primary and was also very careful putting the new one on. My only suggestion is to go slow and thread the cable in like it's glass.(You'll need an O-ring gasket here).Turn the cable as an entire unit while threading. See clutch removal/installation on this forum for further direction and/or manual page 2-69.

6727_20100601102749_L.jpg
 
Step 4: Follow the directions in the manual section 6-7 for clutch release mechanism.I started by removing the screw in the shifter to get it out of the way. So at this point I've removed the clutch inspection cover(you'll need a clutch cover gasket after removing...(I know some re-use, it's up to you).You'll turn the adjusting screw clockwise to release the ramp so the cable end of the ferrell comes free. My only suggestion is to be very careful when removing the coupling from the ramp assembly. It's easily dropped into the primary.I put a wire tie around it and had no problem though...Thankfully. I also wanted to mention I had no need to drain the primary fluid(so draining is up to you) I just changed the fluid last week.

6727_20100601103620_L.jpg


I Apologize for the sideways photo::):)

6727_20100601103156_L.jpg

I also just realized I have more space to add photos....sheesh..Sorry to those that edit this. It was unintentional.[sad]I'm new at the forum thing.

Step 5: Remove the clutch cable from the primary,
6727_20100601103422_L.jpg
 
Step 6: Install lighning (new) clutch cable into primary.See manual section 6-8 for assembly of ramp and hook. Section 6-3 and 2-66 is also helpful.

There are many ways to go through these next few steps if you have a drill press it would make drilling a hole in the handlebar for the turn signal and throttle housing much easier...but I don't so this was the easiest way for me.
Slide the new riser handlebar through the clutch lever bracket after attaching clutch cable to lever bracket and bolt it into the clip-on aligning the flange on the bar with the flange in the clip on.


I took measurements and drilled a hole about 5/8 of an inch in toward the clip-on for the alignment pin in the turn signal housing. Also, cut 5/8 inch off the end of the bar to snug everything up.
6727_20100601110441_L.jpg


6727_20100601104754_L.jpg


Tighten everything down on the bar and install new grip...Half way there[smirk][up]
6727_20100601110640_L.jpg
 
Step 7: Everything on the right side is relatively the same as the left,ie: cutting the bar, drilling the hole, etc. There are a few minor problems I ran into. I had difficulty with the rear brake switch connector that attaches to the bottom of the master cylinder. I cut the housing around the wiring down slightly to fit. (See photo below).
There is very little room for movement when it comes to the front master cylinder. Too far out on the bar and it hits the ferring. Too far in on the bar and the brake light connector hits just wrong on the inside of the "rise" in the bar. If its rotated too far back the brake line limits further movement. So I trimmed it back and it seems to work fine. I may change it later with a 90 degree unit.
6727_20100601110802_L.jpg


6727_20100601105459_L.jpg


6727_20100601105714_L.jpg


6727_20100601105930_L.jpg


6727_20100601110718_L.jpg


The bars fit!:D Hard left, hard right, everything is clear. My riding position is considerably better, It's been wet here so I haven't ridden far yet. The difference is very noticeable though. Much more weight on my feet and less on my arms!!! I'm happy:).

I did want to mention a few things that will be needed for anyone considering doing this. As mentioned above, Lightning clutch cable,1125 riser Bars, Grips (if you want them), Loktite, clutch inspection cover gasket, and an O-ring gasket for the end of the clutch cable.


Let me know what you guys think? Also wanted to thank everyone out there contributing to this site, helped me fake my way through this:)
Any tips,questions,or suggestions are welcomed.

Fourty......
 
Good write up man.

Looks like you did a great job.

Let us know how your ride goes once it dries up there.
 
Great write up! I really like your clutch cable part. It would have helped me a ton last week. lol Good stuff man
 
Buelltech,

The grips are Galindo Pro SB. Part #GA-0190-011X. I purchased them from ASB. I think they were about 10 bucks. They are very hard, I like them that way though.
They also have writing in the rubber that says "superbike". I didn't like that at all so I rotated the writing downward....Problem fixed.:)

Thanks for the input fellas.

Fourty...
 
You game to help out a fellow Bueller and sell your stock bars?

I need a set, actually just the rigth one but figure you would want to sell them as a set.

Let me know
Brandon
 
How tall are ya', Fourty?
Wonderful description [up]

How much do items in opening picture cost?
Handlebars, $225; cable, $56; gasket, $3; o-ring, $1 ... about $285, plus grips, taxes & shipping.
 
TooFst,

I have photos of the complete clutch cable install, top and bottom, just assumed there was already info out there on the topic so I did't apply as much detail in that area.

Thank you very much for the rep point. If you have any further questions or comments they're much appreciated

Xtreme,
You've done a great job with your bikes dude. I'll be coming to you for advice on how to install a lightning tail on my firebolt when the time is right. I've come to appreciate your input on this forum.
About the stock bars...I haven't thought about selling them.... thought I might like to keep them as an option for the future. Any idea what they are worth? I'll think about it and let you know.

Aptbldr,
I'm 6'2" The risers are a nice addition.:). I got the clutch cable for $35. total cost shipped was $284. You're pretty much right on. Well worth the cost for me. You'll be surprised at the difference it makes....

Thanks for the input guys,

Fourty.....
 
I know new the bars are about $20 a piece, so I guess go off that.

I will see if I can just bend mine back at work but think about what you want obviously the lower the better for me:D
 
Brandon, instead of screwing around trying to straighten your bars why not hit up a steel supply store and get a length of 7/8 aluminum bar? Cut and fit as you please, no way it's gonna cost you $40. Wayne
 

Latest posts

Back
Top