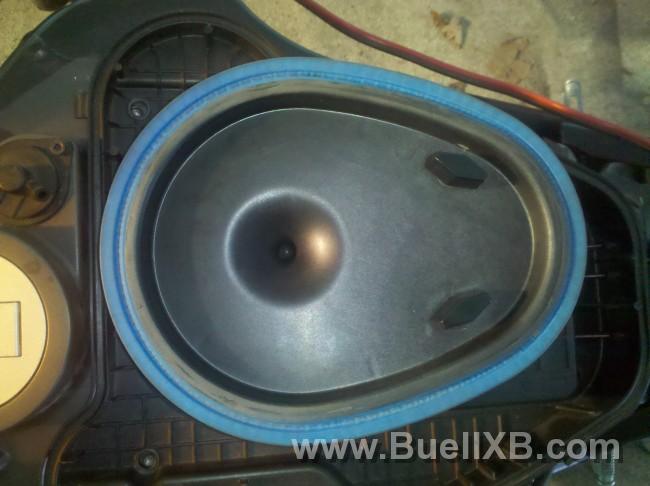
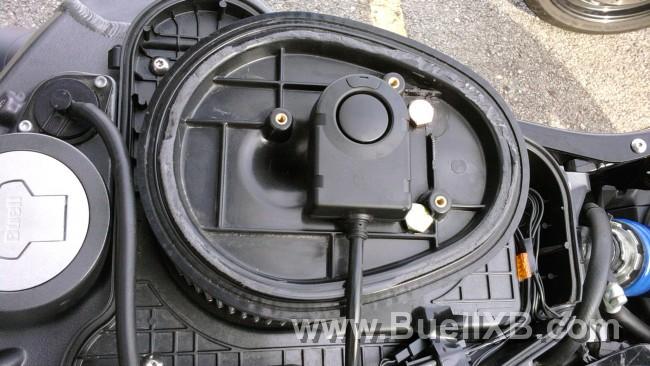
Here is a simple how to on making a open air box out of your stock air box cover. Note only do this if you have enough skill and common sense to work through problems.
Tools: Dremel and bits to cut plastic
2 washers
2 (i dont remember which i bought exactly) 4" or 3" 1/2 screws (we will discuss this soon)
First take off your whole air box assembly. (from top to bottom)
Next Take your air box cover and prepare to cut.
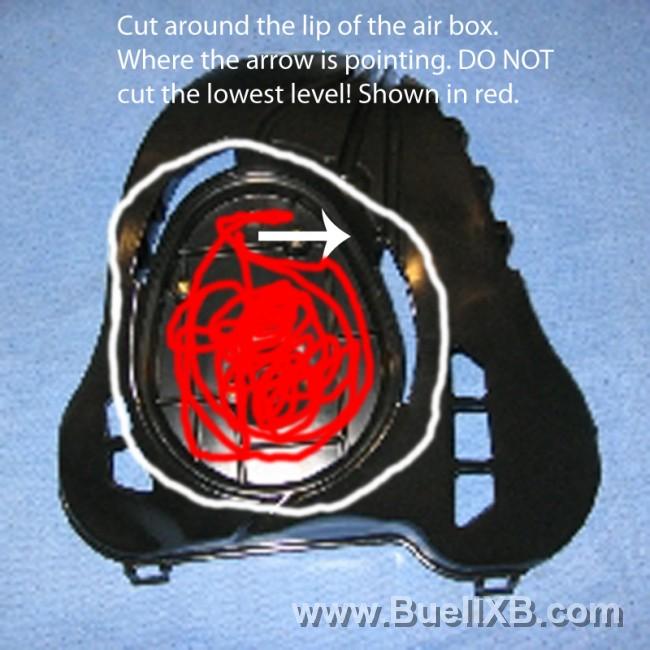
Make sure you cut along the lip the arrow is pointing to, otherwise the cover may slip through the air filter when tighten down.
Once you have the air box cut up and you have the "plate." See if it will still fit on top of your filter without slipping through it. Now for the next step (the hardish step)
You make have to do what I did and that is take your base, filter, and plate into the hardware store. Go to the screw section, look for a screw that fits through the bottom holes and barely pokes through the top of the filter. If i remember right i think i bought 2 4" 1/2 screws. I can find out if you are having trouble tho.
Buy 2 of those screws, 2 nuts that fit them, and 2 washers.
Now its time to drill the holes in the plates for the screws. Here is the best way I did it. Place your plate on the floor, air filter on top, then your base on top of that. Next put your screws in through the 2 holes, line them up straight, then push on them and turn. This will make a mark on the plate where you should cut a hole out. If need be i may be able to explain it alittle better. Just ask.
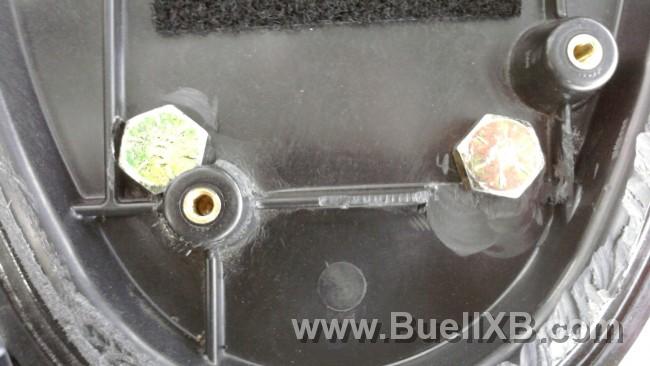
You can kinda tell the placement by the picture. Dremel out a hole that the screw will fit into and cut anything that causes the screw to not fit flush.
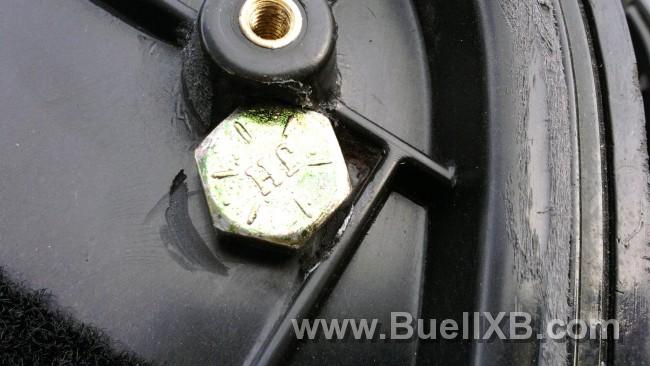
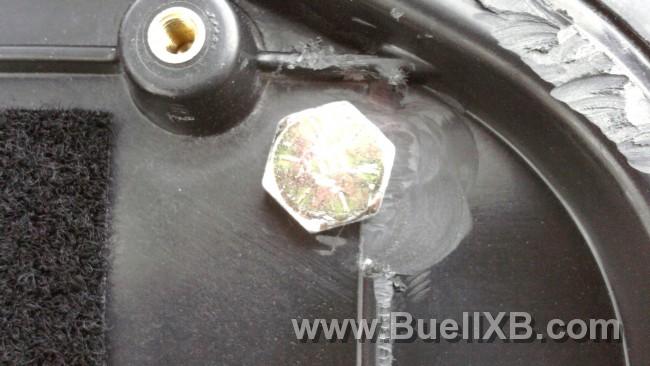
This way youll have a better seal.
Once thats done, slide your screws through the whole assembly and put a washer on the bottom side, then your nut.
(i have two washers, thats because i first thought i would have one on top as well)
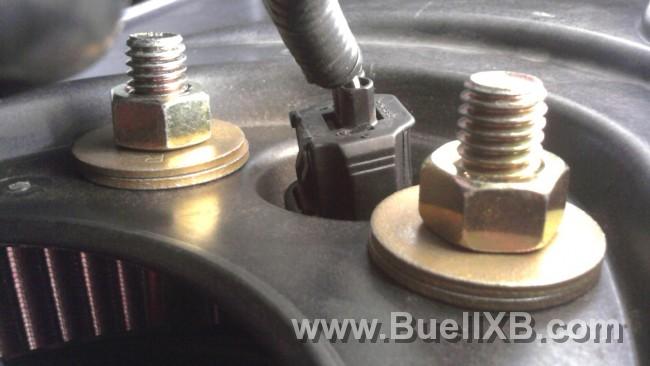
Now for your fuel breather hose. I ran it through the frame and then up the side so it wont move and it will be out of the way a bit. As shown in the pictures.
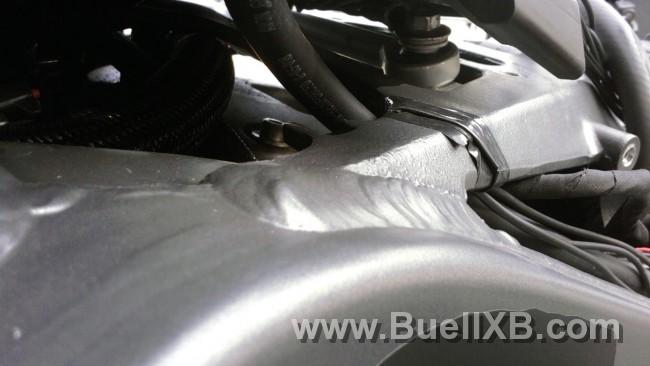
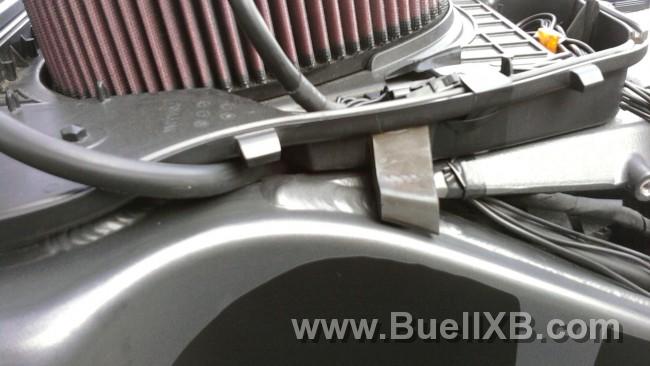
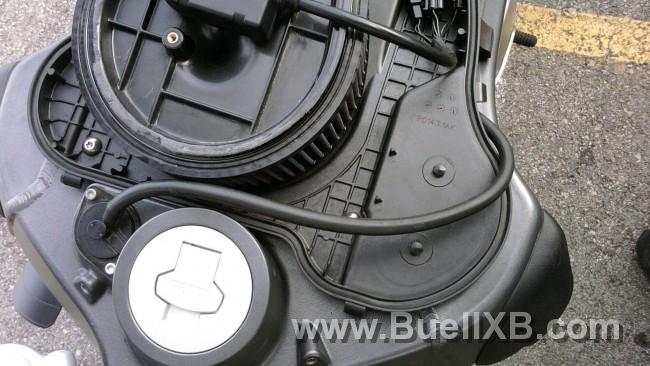
One more thing you may want to do. You may want to drill a small hole in the rear of the base so water can drain out if it gets in there (from rain or power wash). I ended up cutting a chunk out for my wires. A small hole would do just fine.
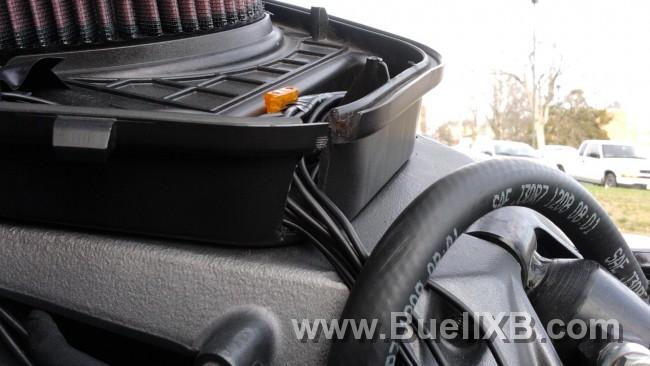
Thats it! Lets hope everything went great for you and it turned out easy and perfect. Now post pics and go out and enjoy all the air you get now!
(Note: this will make your air box louder and you will hear it breathing louder, i know mines annoyingly loud. But the performance makes up for it! Also i am not responsible for any damage but will help out with any questions you may have!)
ENJOY!
Tools: Dremel and bits to cut plastic
2 washers
2 (i dont remember which i bought exactly) 4" or 3" 1/2 screws (we will discuss this soon)
First take off your whole air box assembly. (from top to bottom)
Next Take your air box cover and prepare to cut.

Make sure you cut along the lip the arrow is pointing to, otherwise the cover may slip through the air filter when tighten down.
Once you have the air box cut up and you have the "plate." See if it will still fit on top of your filter without slipping through it. Now for the next step (the hardish step)
You make have to do what I did and that is take your base, filter, and plate into the hardware store. Go to the screw section, look for a screw that fits through the bottom holes and barely pokes through the top of the filter. If i remember right i think i bought 2 4" 1/2 screws. I can find out if you are having trouble tho.
Buy 2 of those screws, 2 nuts that fit them, and 2 washers.
Now its time to drill the holes in the plates for the screws. Here is the best way I did it. Place your plate on the floor, air filter on top, then your base on top of that. Next put your screws in through the 2 holes, line them up straight, then push on them and turn. This will make a mark on the plate where you should cut a hole out. If need be i may be able to explain it alittle better. Just ask.

You can kinda tell the placement by the picture. Dremel out a hole that the screw will fit into and cut anything that causes the screw to not fit flush.


This way youll have a better seal.
Once thats done, slide your screws through the whole assembly and put a washer on the bottom side, then your nut.
(i have two washers, thats because i first thought i would have one on top as well)

Now for your fuel breather hose. I ran it through the frame and then up the side so it wont move and it will be out of the way a bit. As shown in the pictures.


One more thing you may want to do. You may want to drill a small hole in the rear of the base so water can drain out if it gets in there (from rain or power wash). I ended up cutting a chunk out for my wires. A small hole would do just fine.

Thats it! Lets hope everything went great for you and it turned out easy and perfect. Now post pics and go out and enjoy all the air you get now!
(Note: this will make your air box louder and you will hear it breathing louder, i know mines annoyingly loud. But the performance makes up for it! Also i am not responsible for any damage but will help out with any questions you may have!)
ENJOY!


