• You are currently viewing our boards as a guest which gives you limited access to view most discussions and access our other features. By joining our free community you will see less advertisements, have access to post topics, communicate privately with other members (PM), respond to polls, upload content and access many other special features. Registration is fast, simple and absolutely free so please, join our community today!

    If you have any problems with the registration process or your account login, please contact us.

Catch Can V2.0

Buellxb Forum

Help Support Buellxb Forum:

The next step is you have to cut threads in the catch can. I did not specify the NPT threads on the drawings on purpose because of you have to cut the threads and check fitting fitments individually. NPT thread is tapered so you have to cut it carefully frequently checking fitments, do not cut it too deep. The rule is simple - the fitting should be able to be tightened by bare hand to 4-4.5 turns.

You have to start cutting threads as perpendicular to the hole face as possible.

Prepare 1/4-18 NPT thread cutting tool

IMAG5875.jpg


I used drill press to start threads as perpendicular to the face as possible

IMAG5877.jpg


Do not forget to lube the hole and thread cutting tool while thread cutting process

IMAG5878.jpg


I put the tap in the drill press and turned it manually a few turns to start threads perfectly perpendicular to the face. Then you can remove the parts from the drill press and proceed thread cutting with thread cutting bar

IMAG5879.jpg


IMAG5880.jpg


Check the fittings fitments each few turns of the thread cutter until you start approaching to 4 turns tight by bare hand. Clean the hole with compressed air before checking fitments. Do not cut threads deeper than bare hand 4.5 turns of the fitting you are going to use in this particular hole. Use the only fitting which will go in his particular hole you are cutting to check fitments. Fittings can have different threated area sizes so two different fittings can go to different depth in the same hole.

IMAG5883.jpg


Cut threads in all three holes where you are going to stick fittings. Clean the parts thoroughly.

IMAG5889.jpg


IMAG5890.jpg


Now you are ready to install fittings

IMAG5893.jpg


Use Teflon tape to wrap the fitting thread a couple times before attaching to the catch can

IMAG5894.jpg


IMAG5895.jpg


Then attach fitting to the catch can and tighten it with wrench. Do not over tighten the fittings.

Attach the air filter (exhaust)

IMAG5896.jpg


Attach the elbow fitting. Make sure the elbow fitting oriented properly after tightening. If it is already too tight but still needs more than 1/4 turn to achieve necessary orientation, undo the fitting, clean Teflon tape from threads, apply new Teflon tape with one extra layer and try it again until tightened fitting position will be in the appropriate fitting orientation.

IMAG5898.jpg


Attach the petcock drain plug

IMAG5901.jpg


Check there is no Teflon tape excess covering the fitting holes

IMAG5902.jpg
 
Last edited:
Now you can start assembling the catch can.

Attach the big o-ring first

IMAG5911.jpg


IMAG5912.jpg


Attach screws and small o-rings

IMAG5914.jpg


Assemble the catch can and tighten the screws with Torx screwdriver

IMAG5915.jpg


IMAG5916.jpg


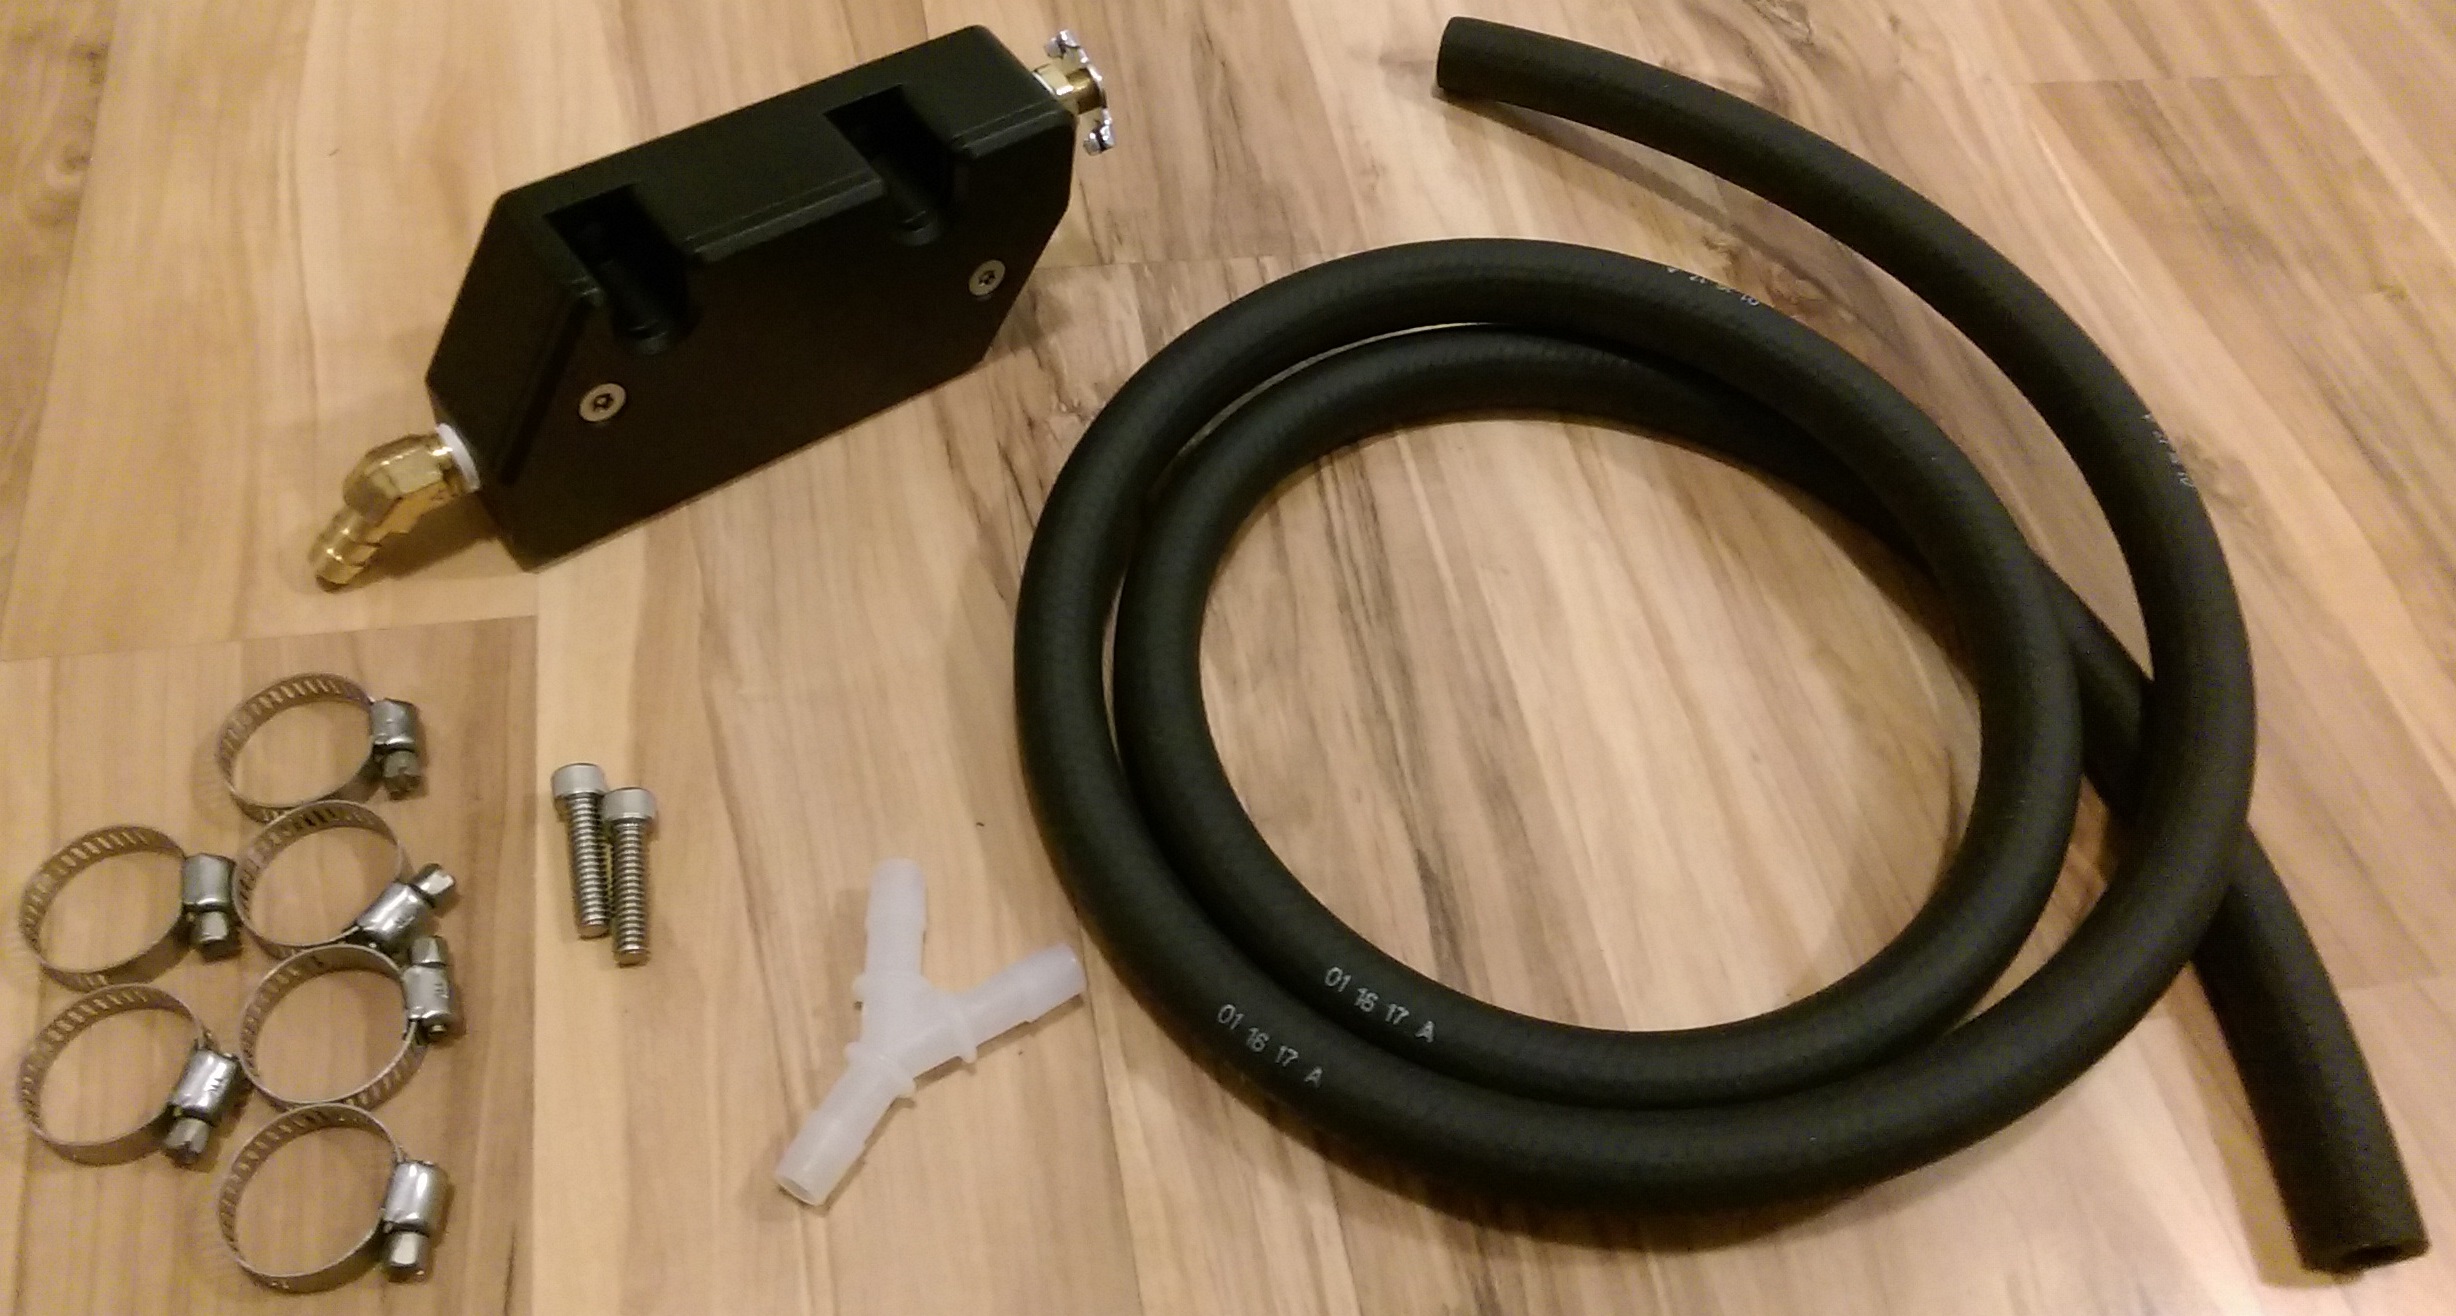
Done! And here is my homemade breather reroute kit

IMAG5919.jpg


So now you just need to install it following this instruction http://www.kdfab.com/catchcaninstructions.htm
 
Last edited:
It's expensive, it may not be necessary, it doesn't hurt anything, it looks cool. If you like it and want one on your bike then I say he'll yeah.
 
It's expensive, it may not be necessary, it doesn't hurt anything, it looks cool. If you like it and want one on your bike then I say he'll yeah.

Exactly where I stand with it. Whether or not you agree with the concept or the rationalization, the execution is above and beyond that of most aftermarket manufacturers.
 
Here is probably another reason for breather reroute mode.

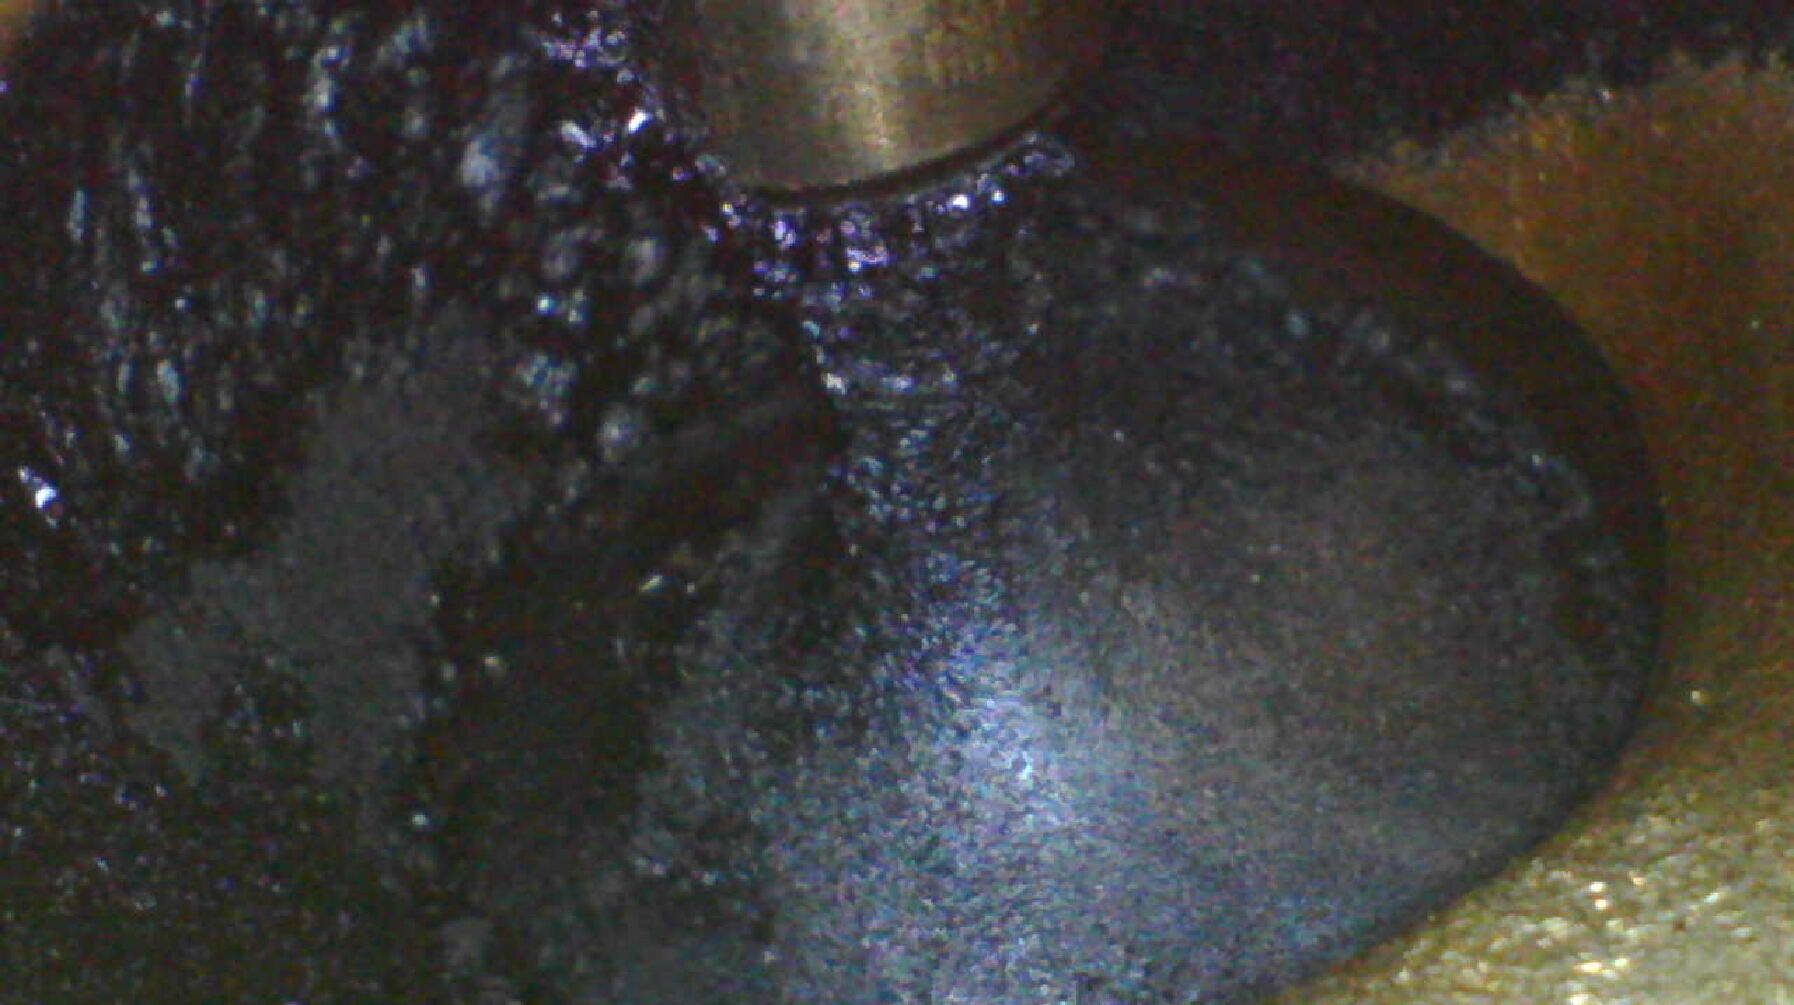
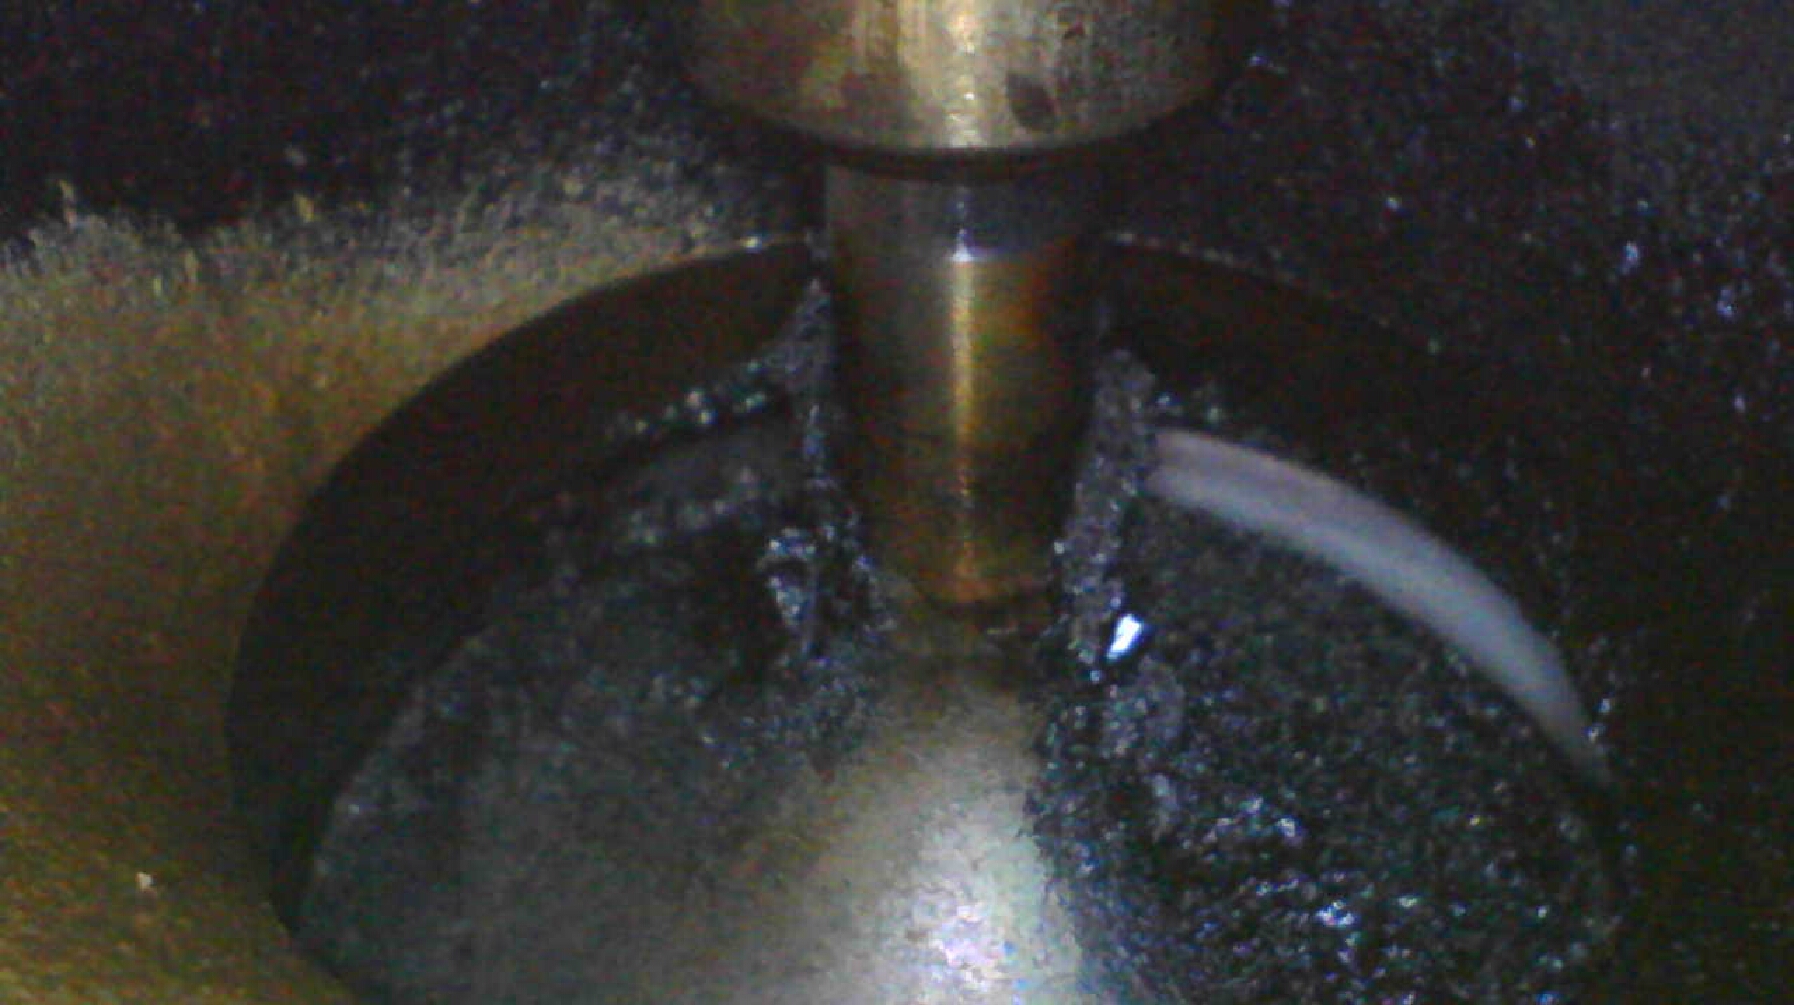
Here is current valves condition after probably 10 Sea Foam cans last year. They look just slightly cleaner than a year ago when I checked them last time before SeaFom procedures, but still look horrible. They look like stalactite caves.


Rear cylinder intake valve

2017_08_27_09_40_37.jpg


Front cylinder intake valve

2017_08_27_09_34_01.jpg


Thoughts?
 
Last edited:
Exactly where I stand with it. Whether or not you agree with the concept or the rationalization, the execution is above and beyond that of most aftermarket manufacturers.

There's no questioning TPEHAK has some engineering skills. Hell, he shows them off every chance he gets and I won't discredit those skills. However, this thread is beyond what most of us DIY guys can accomplish. Also, to me this defeats the purpose of most DIY projects. I'll spend all the time I have to, in order to save money, in order to avoid having to pay someone to do simple mechanical things that are within my wheelhouse of talent.
But I have said this before and I'll say it again; do what you want with your bike. The bike is an expression of who you are and what you're about.
TPEHAK this thread is what you're all about.
Not my flavor, I'm all about trying to save a few bucks, so I apologize for being over opinionated.
 
When I commented on this page I wasn't trying start crap, but someone not in the know of engine components, issues, and diagnostics might see this and be like my engine is puking all this oil threw my breathers and this guy made a 300 dollar catch can, and I need one. But the real issues are internal sealing problems. Once again I never seen a oil blow by catch can on a car or another bike. Other than turbo catch cans or a race car with low drag race rings there shouldn't be excessive oil blow by. And most race car guys don't give a crap about catching that oil. I have heard of these sporty motors having breathing issues. But nothing like I have seen on this forum.
 
Last edited:
These are sub 100 horse motors with horrible under square bore and stroke. The piston speeds at 5000 rpm are outragous compared to other v twins that are over square. Doing a reroute is pointless unless you are going in deep.... I find this bike more as a novelty, fun to ride and toy with. Now on the other hand siverrider our EBR 1190 bikes are a different story... built for performance.
 
X2 ^^^^^^^:eagerness:

Like I said before, to each their own. It may be pointless to some and the benefits may be infinitesimal, but it's pretty and sure isn't hurting anything other than your wallet. Sometimes an engineering exercise is exactly that. I'm sure TPHAK is enjoying himself, and good on him for it.
We all have seen much more spent for much less purpose.

Bling-Motorcycle.jpg


TPHAK, the cleanliness of your fingernails tells the whole story:angel:


Sorry, I couldn't help myself:) haha
 
Last edited:
TPHAK, the cleanliness of your fingernails tells the whole story:angel:

^^^^^ LMAO! best comment on this whole thread!


Sorry, I also couldn't help myself:)
 
TPHAK the valves in the picture are classic high millage light oil burn. I would check your plugs. They should be a nice light tan on the porcelain among other things. Nothing to really worry about could be ran forever like that. Does your bike use oil between changes?
 
X2 ^^^^^^^:eagerness:

Like I said before, to each their own. It may be pointless to some and the benefits may be infinitesimal, but it's pretty and sure isn't hurting anything other than your wallet. Sometimes an engineering exercise is exactly that. I'm sure TPHAK is enjoying himself, and good on him for it.
We all have seen much more spent for much less purpose.

Bling-Motorcycle.jpg


TPHAK, the cleanliness of your fingernails tells the whole story:angel:


Sorry, I couldn't help myself:) haha

:encouragement:
 
TPHAK the valves in the picture are classic high millage light oil burn. I would check your plugs. They should be a nice light tan on the porcelain among other things. Nothing to really worry about could be ran forever like that. Does your bike use oil between changes?

I add about 80 ml oil couple times between oil changes to keep it leveled.

Here is the front spark plugs condition

IMAG5946.jpg


Here is the rear spark plug condition

IMAG5947.jpg


Here is the front piston

2017_08_27_12_13_00.jpg


Here is the rear piston


2017_08_27_13_07_56.jpg


Here is the close picture of the piston top face

2017_08_27_13_08_48.jpg


It looks like SeaFoam does not work at all.
 
I would have a look at those valve seals . And the front plug looks like your running some sort of fuel additive.
 
And reading plugs is kind of an "art form". There are a lot of things to be looking at, and with a magnifying lens and good clean light source no colors in the light. You wanna look all the way down where the porcelain meets metal. Where the color breaks on the porcelain. The ground color and where it breaks on the strap. And how the centre is burning, is it chipping away molting looking. Even on fuel injection you should check it. Even micro specs of metal might be on there. This all means things on how the machine is operating. And a good compression/leakdown test...
 
Back
Top