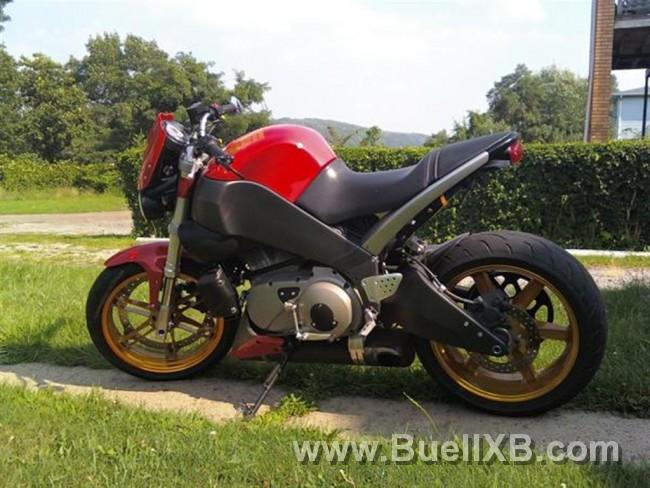
Tail Chop....what to use?

Buellxb Forum

Help Support Buellxb Forum:

theoctopus

Well-known member
Joined
Jul 22, 2009
Messages
1,983
Hey all,

I'm planning on chopping the cheesegrater pretty soon, and had a couple quick questions.

First, having read a fair amount about the job, it appears that most of the chops were done with a grinder. What kind of grinder do people use? Angle grinder? Bench grinder (god, I can't imagine using a bench grinder....)?

Second, how many of you used a rattle can paint job and were happy with the results? How did you prime the tail section prior to paint? What sort of paint did you use?

Third, how did you route the turn signals after chopping the tail? Given how the turns are mounted stock, there's a simple way to route wiring up into the under-seat area of the bike. Mounting the signals further back (as most do when doing the cheesegrater removal) would seem to create some issues for where to run the wiring. Am I wrong?

Thanks again for all the help. And I'm sorry for the questions if they seem stupid. I like to be prepared prior to doing any serious mods to my bike.
 
Hey Max,
Glad you are chopping the cheese grater, it's the only part i don't like about the lightning.
Some of the guys use dremels which i have one, so hit me up if you want to barrow it.
 
Right on. I'm still debating whether I want to handle the project now, or wait till the end of September when I'll have my garage back up and running. We'll see what happens. That tail piece keeps looking at me funny, and I sure as hell want to cut the f#$ker off.
 
haha No joke! When we go for a ride I'll probably give you sh*t about it but it's only to motivate you to CHOP IT :)
But I would wait 'til September too. If no shop space, it kinda rushes the job and it probably wont turn out too clean.
 
I did the rough cutting with a hacksaw and a cut-off wheel. Used an angle grinder with pretty aggressive paper on it to remove all the excess material.

I did use a rattle can and was happy with the results , but not thrilled...The paint is a little soft and can chip when putting the seat back on if you're not being careful. I use Rustoleum "automotive grade" primer and paint. Powder coating would be ideal I think.

Turn signals: I used signals that I bought from Motosport.com that I mounted under the seat area (see pic) and just used crimp connectors to tap into the OEM wiring w/o cutting it or having to extend any wires. You can kinda stretch & move the OEM wires around to suit. (to an extent)

Good luck!!

3525_20090705062705_L.jpg


3525_20090810120119_L.jpg
 
I drilled two holes on the flat part of the tail section just under the seat and installed two led turnsignals there.
 
Oh and for the paint job i chose not to paint it i just put it back on for now and its gonna get powder coated in the winter. I think thats ur best bet.
 
I had a mate do mine. He cut the majority off with a band saw then used a hand grinder with the paper wheels to finish it off. He went through 3 of the pads/paper wheels (not technically minded).
I then went to autozone and got one can of silver paint for the base and then the top coat red.
My first ever paint job and it came out good then i covered it in about 6 coats of clear coat to protect it. It has chipped a little but thats because i pushed it in to my work bench too hard.
I went to the single tail light from www.xblights.com. Plug and play and really bright.
404_20090123220250_L.jpg

404_20090123220302_L.jpg
 
I used a cutting wheel, and then a sanding wheel to shape and smooth it out. Its at the shop right now being powder coated.

For turn signals I got the smoke lens Led tail light with intergrated turn signals.
 
What did you use the cutting wheel with? I've used a cutting wheel with everything from table saws to bench grinders. Did you use a dremel?
 
Not a dremel. I used a Matco wiz wheel, and a small Matco die grinder with a sanding wheel.

One of the perks of being a auto tech and having $20k in tools is always having the right tool for my personal projects ;)
 
I used a portaban saw and angle grinder with flap sand disc wheels. I rattle canned it silver to get close to matching the stock seat rails, but plan on powder coating everything during the winter.


2058_20090423064343_L.jpg
 
I used a cut off wheel.. My buddy used a hack saw and file!! That stuff cuts like budda
 
Thanks for all the help guys.

Any of you know if an '07 XB12Ss tail will fit onto an '09? There's one for sale on eBay, and if the guy is willing to take a lower offer I might just pick it up and do the tail chop on that unit first.

Thanks again.
 
I recommend you don't use any kind of abrasive wheel since the tail section is Aluminum. Soft metals pack onto abrasive wheels and conduct heat over what the disc can take. They explode and little dremel wheels hurt like a bitch, you don't want a full size grinder wheel blowing up. Not to mention it ruins the wheel for further use.

The best tool to lop off the excess right to start with is a sabersaw, hacksaw, or bandsaw. After that, use powersanders with high-grit paper such as 60, 80, or 100 grit to shape the new tail. Finally, sand up to a relatively high grit 320-400 removing deep scratches. Finally prime and paint, or have it powdercoated.
 
i did mine and documented the whole thing with pics of every step and it only took about 3 hours once i had it off the bike.

i used an angle grinder with a zip disc to start, then a grinder disc to take off the little pieces left behind and then a sanding disc to make it all smooth.I finished it off with a rattle can of bed liner paint. it has a high rubber content so i find it to be very durable and it has a cool bumpy finish that will cover any imperfections

i re used the stock signals for now and just re drilled holes once it was all back on the bike

if anyone knows where to save pics so i can add them to a post in the do it yourself section let me know
 
Back
Top