How do I do Firebolt front fairing lowering mod?

Buellxb Forum

Help Support Buellxb Forum:

Today's update on the project from Kevin (Drummer Racing):

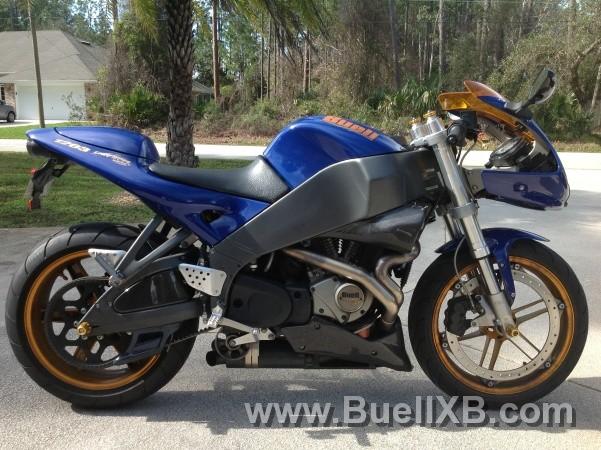
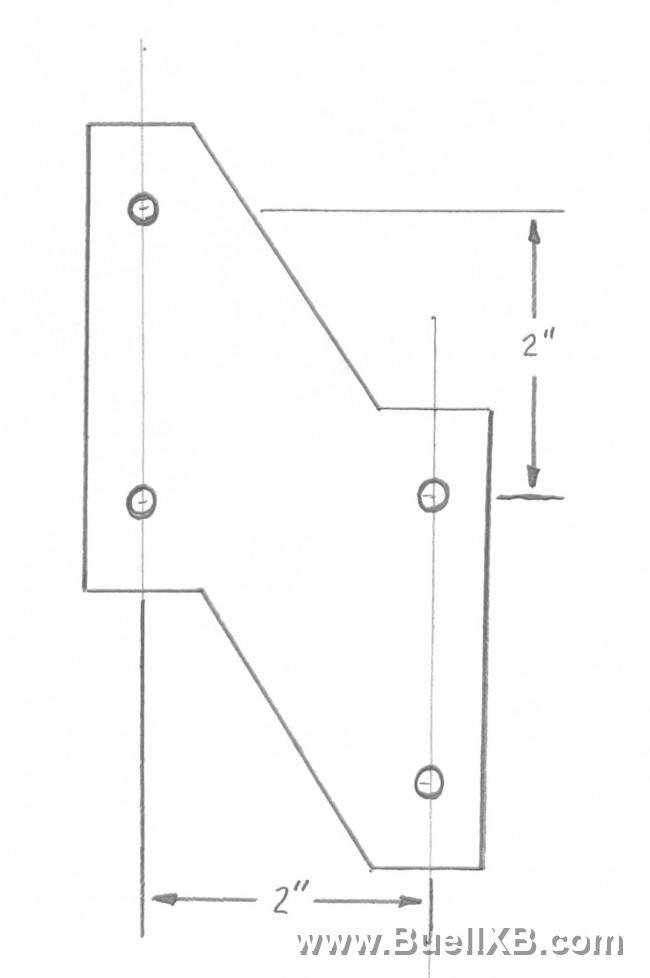
To the image above of the literal cut and paste of a 9R profile stock photo depicting a scaled 2" forward extension and 2" drop of the front fairing, Kevin says "NICE!".

He said he is "working on it now", he said, "gonna make it from cardboard first...after I mock it I'll get materials for the final".

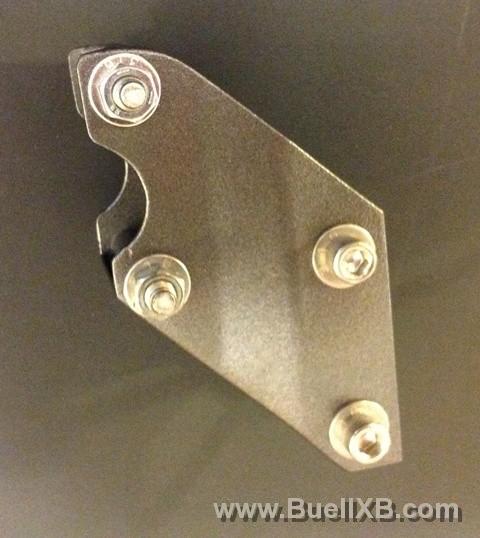
Later, to that, he added, "I have some material at the shop that I think is thick enough...WILL TRY TO FINISH IT NEXT WEEK...really busy at the moment".

To that, I answered, "Excellent! Thank you for the update. Quite naturally I am anxious, but I would NEVER rush this, and even if I could, would never presume to arrange your work schedule".

Good things come to those who wait.
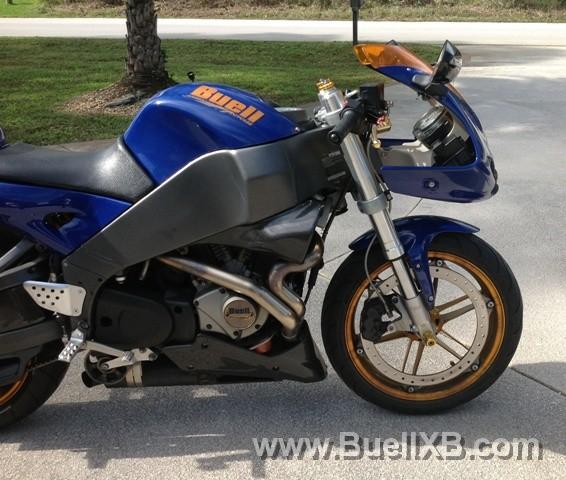
 
UPDATE FOR THE DAY FROM KEVIN AT DRUMMER RACING:

He sent me pics of a prototype bracket kit he made out of wood, with the 2" drop and 2" forward extention. In the pics he actually mounted the front fairing to a bike with the wood mock part. He said it looks like there will be clearance for the handlebars, but he will test that. Once he has the wooden prototype all worked out, he will make the final part.
 
TODAY'S UPDATE:

In preparation for the final steps, Kevin asked what is the paint color of the frame on my '05 XB12R (dark gray) - so that he could paint the brackets so they would match the frame.

SWEET.
 
Kevin called me today - he was putting the last coat of paint on the custom fairing mount. He said it is a really nicely finished and nice looking part - made to look like it is part of the frame. He expected to ship it by Monday, which means I should have it by Wednesday. Talk to you then.
 
Kevin said he is including all the mounting hardware, everything needed to install the mod right off.

He is also continuing to work on some other parts ("side plates", he called them) he is then going to send me, at no extra charge, to experiment with different forward extension dimensions. He said these will not be nicely finished like the main part he sent (no smoothed, rounded finished edges, no paint, etc.)
 
i am interested in doing this, but not two inch forward. i think that is too far. will look to see how yours comes out.
 
Kevin texted me yesterday (Monday) that he shipped the parcel and gave me the package tracking number. Should be here in 2-3 days.

Thanks, twoguns, the rough image above shows a scaled 2 inch drop and 2 inch forward extension. The drop is the main goal of this mod, the forward extension is only provided to assure clearances for the handlebars - we were not confident if they would clear with no forward extension. Also some forward extention alone is necessary to do the conversion to a radial front brake master cyclinder, which is a planned future mod anyway...killing two birds with one stone...

Included in what I am going for in this look is a 150 front tire (if you saw my posts on another thread someone started re: larger front tire). The new 150 tire from Chapparral Motorsports is scheduled for delivery today. I already have the 200/50 rear tire, Scg rear shock installed and forks slipped 3/4" inch for lowering. FAT - LOW - MEAN

Step-by-step detailed pics and descriptive posts will follow as these changes are implimented. Yes, once completed, on this bike, function follows form.

Thank you.
 
thats the look i am trying for with one of my bikes. i have a 240 conversion, and have cut down the front screen and fairing. looks great. am thinking to lower it but only go forward the minimum required. not sure about the larger front tyre yet, just due to how i ride. interested to see how yours looks when done.
 
ANIMOSITY
Im interested in this, but would need pics of the finished product.

Yes, sir:

Step-by-step detailed pics and descriptive posts will follow as these changes are implimented.

twoguns - I PM'd you - I'd totally go for the 240 rear if I could keep the belt. That would go right with the look.
 
Drummer Racing / KD Fabrication finished the bracket kit for me this week, shipped it, it was delivered, and I am pleased to report I installed it and am EXTREMELY happy with it. Following below are a number of individual posts to document the bracket, details of installing it, and the results.

Here is the rough 2D (X-Y) conceptual sketch I sent to Kevin, just to get him thinking about the design. I show the 2" drop and 2" forward extension, but of course Kevin had to develope the many other detailed dimensions and aspects of the design, of course including the third dimension (Z), the bends of the end plates, etc.


11778_20130112162052_L.jpg
 
Since I took a LOT of pics of this whole project, I think it may be best to document this project in separate posts.

Here are photos I took of the finished product when it arrived here. Kevin included new mounting hardware with the bracket. The matching four pieces of new hardware is respectively shorter than the original two front fairing bracket mounting hardware, appropriate for his design (although the two original hardware sets would have worked fine in two spots but then extra length of bolt thread would have protruded on one side, and they wouldn't have really matched). The paint is an exact match for the frame color (the dark gray). "A picture is worth a thousand words", and these photos speak for themselves as far as showing how the bracket is made, but for a brief description, there are sides plates and a top covering plate, welded together, curved around, with hollow tubes appropriately placed where needed through which the bolts pass, all shaped and sized to fit the mounting points on the front of the frame, as well as the fairing support frame.

11778_20130112171218_L.jpg


11778_20130112171126_L.jpg


11778_20130112171005_L.jpg


11778_20130112170923_L.jpg


11778_20130112170851_L.jpg


11778_20130112164749_L.jpg


Coming up is how to install the part, with photos and a brief description.
 
The installation of the above Firebolt front fairing lowering bracket is pretty straight-forward and self-explanatory. I found it easier to first remove the mirrors, front turn signals (if applicable), and front fairing and windscreen to get it out of the way - simple enough.

Then remove the hardware holding the front fairing support frame to the main frame.

11778_20130112181355_L.jpg


Once the fairing support frame was unmounted and free-floating, to give more slack to the wiring harness, I completely removed the wiring harness cable clamp from where it mounted at the lower nut, and also unmounted and completely removed the two wiring harness cable clamps from the spots where they are mounted on the underside of the fairing frame. I also clipped and removed the several zip ties that wrap around the wiring harness. The extra slack that is provided in the wiring harness is taken up with this lowering bracket installed, therefore I found it unnecessary to re-install the cable clamps and left them off when I put everything back together because with the lowering bracket installed the wiring harness was pulled fairly tightly - not overly tight to my estimation but tight enough where you don't need the cable clamps to pull the wiring harness to the fairing bracket to take up any slack. When I was all done, I did install still several zip ties to tidy the wiring and pull upwards what needed to be pulled upwards.

11778_20130112184603_L.jpg


Then I installed the new fairing lowering bracket to the fairing support frame:

11778_20130112184759_L.jpg
 
Then it was time to mount the installed lowering bracket to the main frame where the fairing support frame was mounted. I routed the wiring behind the lowering bracket.

To ease assembly I first lined up the lower holes and temporarily slid an appropriately-sized hex driver through the lower holes as an "alignment tool" to keep them lined up:


11778_20130112192056_L.jpg


I then carefully adjusted the routing of the wiring behind the lowering bracket, as I gradually and slowly swiveled the bracket so the upper holes lined up. I went slowly and used care as to not pinch any wires as I lined everything up. I then installed and finger-tightened the upper mounting hardware:

11778_20130112192350_L.jpg


I then removed the temporary "alignment tool" from the lower holes, installed the lower hardware and torqued everything up:

11778_20130112192554_L.jpg


11778_20130112192657_L.jpg
 
Here are a couple of looks at the routing and positioning of the wiring harness where it passes on the left side of the fairing mounting, with the steering at full left lock. Things are a bit tight of a fit, but nothing is actually getting pinched, and the steering goes full lock both left and right with no interferences:

11778_20130112195848_L.jpg


11778_20130112195938_L.jpg
 
So here's a bunch of pics of what she is looking like at this point – sorry for so many pics, but I just wanted you to get a good look at her!

11778_20130112192657_L.jpg


11778_20130112193744_L.jpg


11778_20130112194040_L.jpg


11778_20130112194139_L.jpg


11778_20130112194258_L.jpg


11778_20130112194517_L.jpg


11778_20130112194216_L.jpg


11778_20130112194914_L.jpg


11778_20130112195030_L.jpg


11778_20130112202209_L.jpg


11778_20130112202136_L.jpg
 
Alright, I don’t want to weary you – taking all these pics makes this seem like it is taking a while to do, and you looking at all these pics probably makes you think it takes a while too, but it is really pretty easy to do…so let’s wrap this up. So now its time to put several zip ties on the wiring on the underside of the fairing, install the fairing and windscreen, the front turn signals and the mirrors, and we're done! Here's a couple of quick pics, just so you can get a quick look at her, and then plenty more below:

11778_20130112203515_L.jpg


Took her for a bit of a test ride. Everything pretty much feels the same as best as I can tell so far - steering, handling, etc. With only lowering it 2 inches, no significant increase, if any, of the amount of air that hits you. The fairing is not lowered enough to have an affect on the cooling air flow to the scoops. The instruments are as visible as before.
 
Coupled with the 2 inch forward extension, there is just as much clearance of the handlebar area as there was before, if not more.

Before I got my Firebolt, I was actually shopping for a Ully - but when I saw the Firebolt at the dealer, I was hooked - I had to have it. Syling-wise, I always thought the fairing "stuck up" a bit too high. To me - and this is my oppinion and no one has to agree of course - this is the height the fairing has always needed to be, style-wise. Pushing it 2 inches lower is as low as you practically want to go, without getting into modifying/extending the wiring harness - other than that, there is actually room to go a bit lower. The forward extension is only to accommodate movement of the handlebars without interference - especially even after I go with the Brembo radial front brake master cylinder. Regarding styling of the forward extension, the look puts me a little bit in mind of a drag bike look, which was not my styling goal but one I expected. I just wanted it lowered. I like it. I sent pics to Kevin, who made the lowering bracket, including some close up pics of the bracket like below, and he said, "it looks like it was made that way".

11778_20130112202650_L.jpg
 
Alright, here are the rest of the pics - I know...I over did it ;)

11778_20130112211507_L.jpg


11778_20130112211603_L.jpg


11778_20130112211658_L.jpg


11778_20130112211813_L.jpg


11778_20130112212040_L.jpg


11778_20130112212133_L.jpg


11778_20130112212249_L.jpg


11778_20130112212208_L.jpg


11778_20130112212442_L.jpg


11778_20130112212409_L.jpg


11778_20130112212813_L.jpg


11778_20130112212903_L.jpg


11778_20130112212935_L.jpg


I WOULD LIKE TO THANK KEVIN DRUM OF DRUMMER RACING / KD FABRICATION FOR MAKING THIS MODIFICATION A REALITY

Of course if you are interested in doing this, look Kevin up.
 
good job and write up. got the result you wanted and it looks well done.

for me though it is way to far forward. i would be just happy with the 2 inch drop and then with what ever the minimum forward it is to have it work.

every time i look at my lady's 09 bolt with the Scg conversion the location of hte headlight relation to the front wheel fairing looks a lot better on hers than on my stock bolt. i know the drop will work on our roads as babee has taken the bolt on a few jaunts.
 

Latest posts

Back
Top