So the crap ceramic coating job on my headers started to flake as soon as I got them up to temp. So since I had to rotate my engine once more, I thought I would document and share how I did it. Hope it helps somebody out!
Put your bike on a stand in a comfortable area with good lighting. A dining room works particularly well.
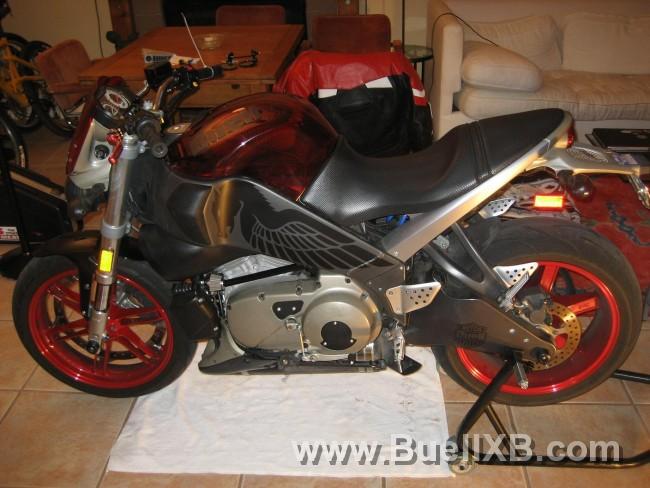
Unplug the connector for the fuel pump located behind the left rider foot peg. Then start the bike and let it run out of fuel. "This step is always performed in order to purge fuel lines" according to the service manual.
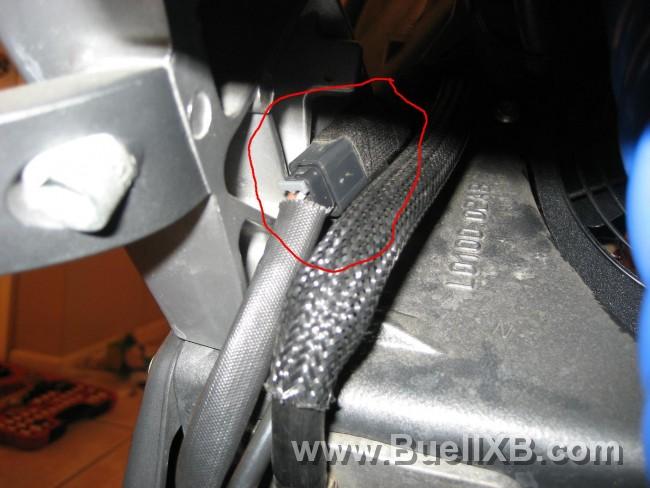
Remove the seat and disconnect the battery.
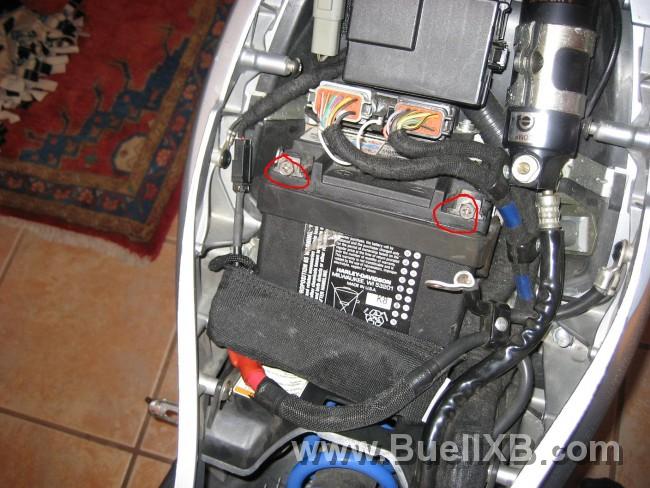
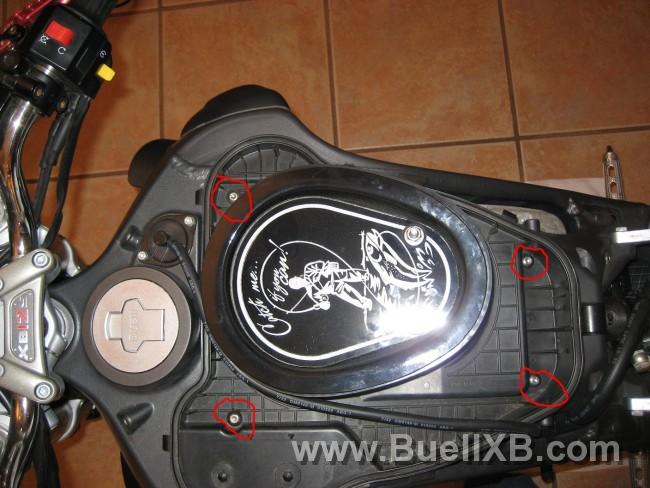
Remove the outer airbox, and inner airbox.
Remove the air filter base. (4 bolts) Remember to unplug the sensor at the bottom of the base before pulling it all the way off. The velocity stack is pushed down through the base as you pull it up.
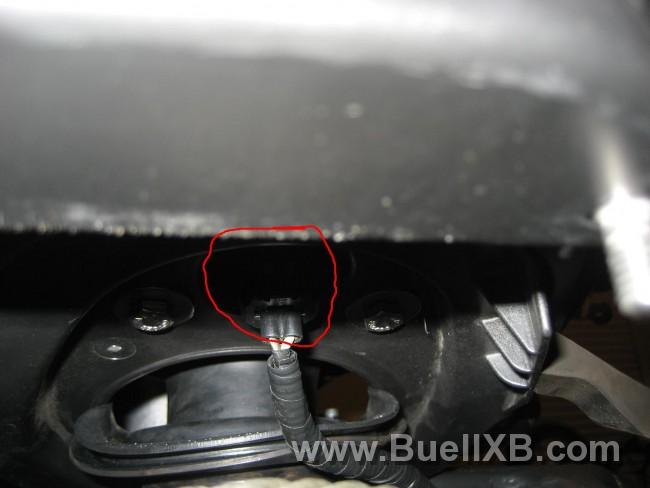
Remove the velocity stack. I find using a strong zip tie works well to pull the spring together.
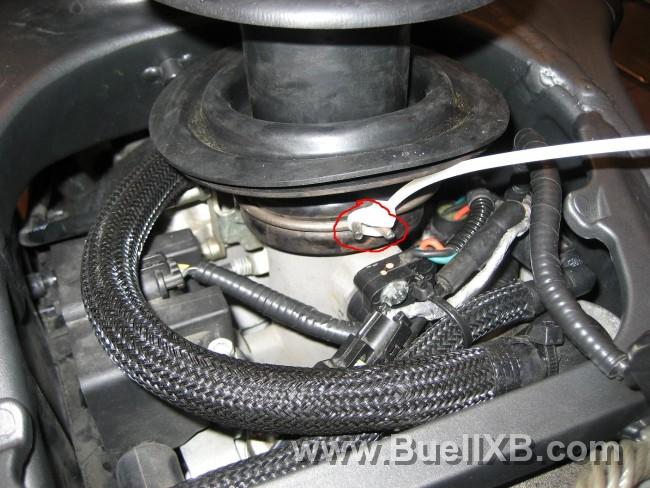
Cover the induction module
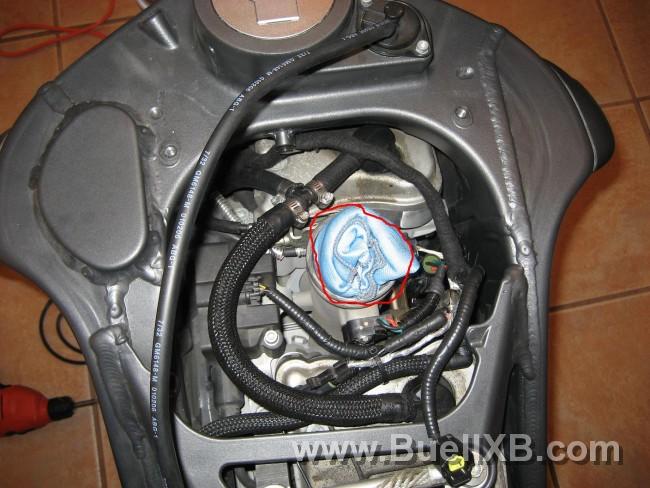
Disconnect the Temperatue and Oxygen sensors
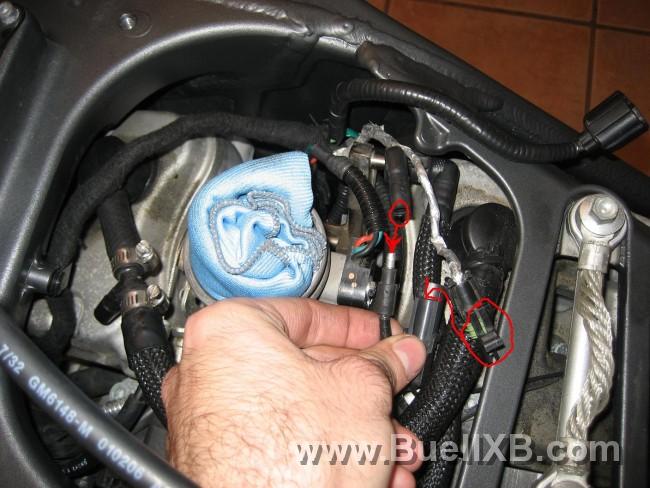
Disconnect the coil
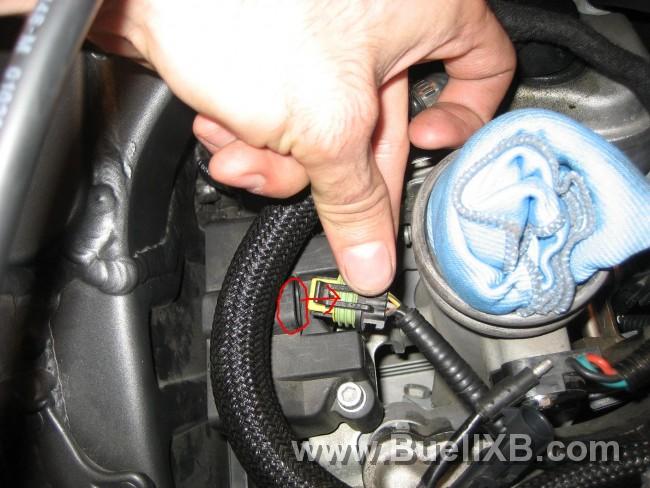
Remove the bolts holding the coil (2 bolts)
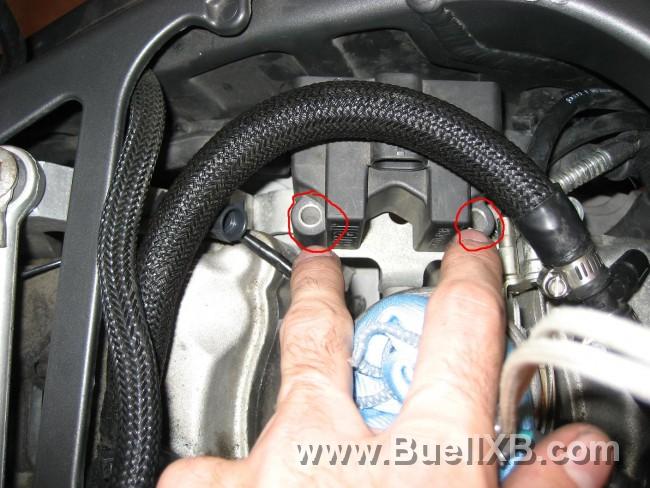
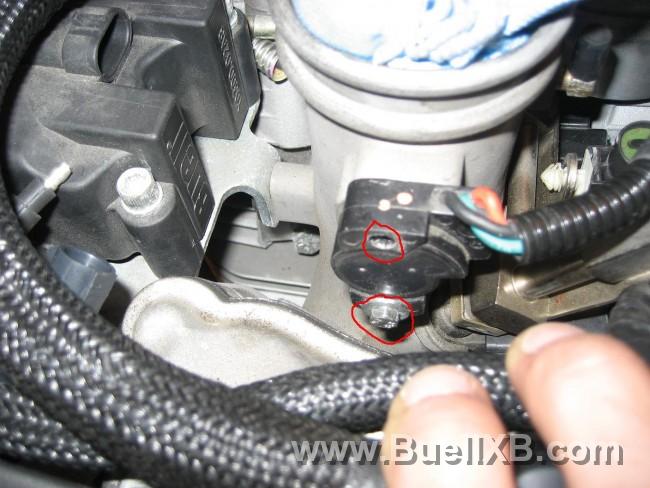
Disconnect the Throttle position sensor (2 bolts)
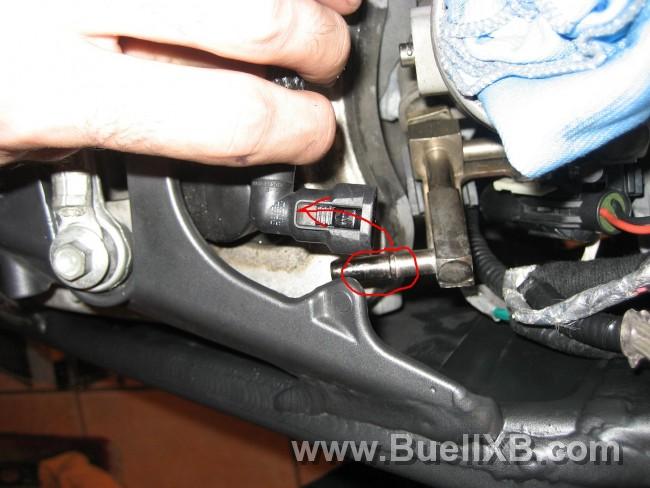
Disconnect the fuel line
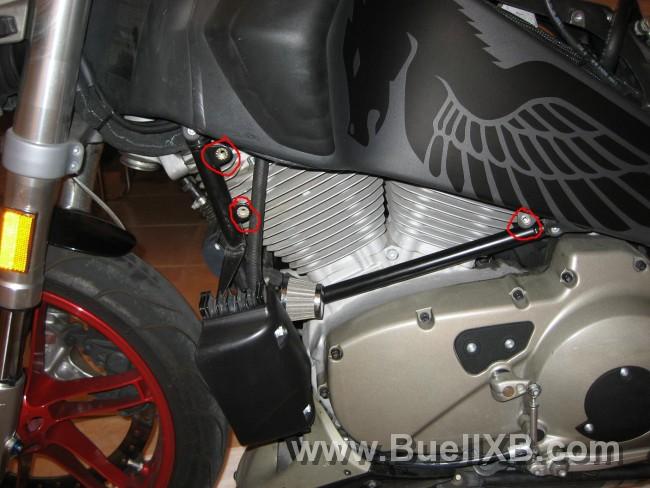
Remove the right hand side scoop (3 bolts)
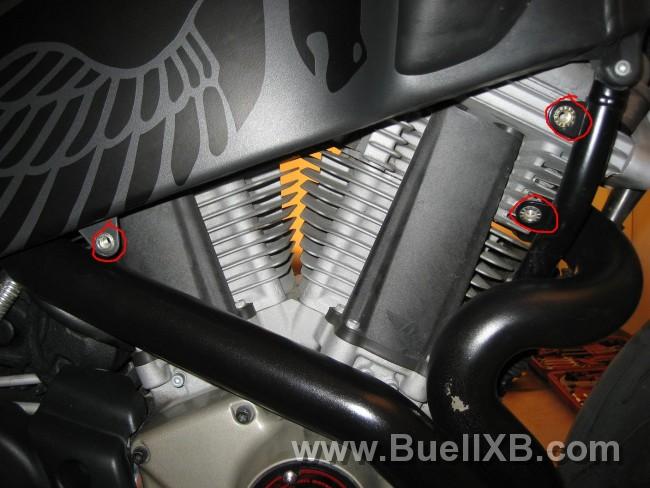
Remove the left hand side scoop (3 bolts)
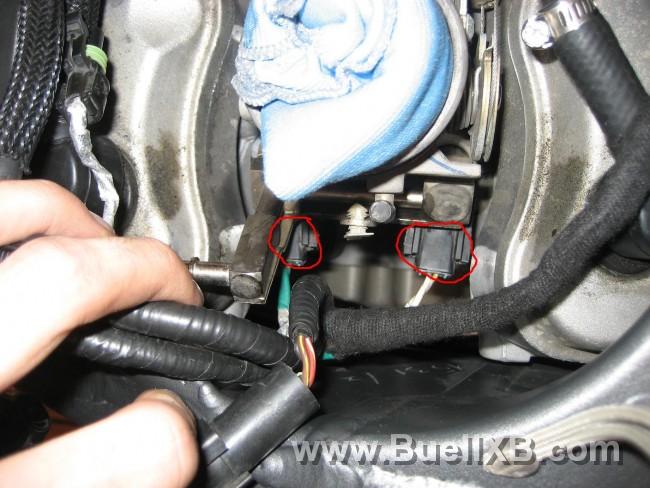
Disconnect the fuel injector leads. It is easiest to reach up from the bottom to disconnect these.
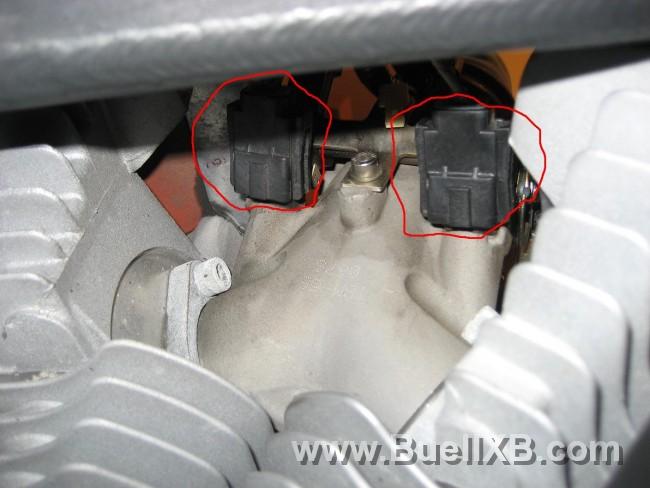
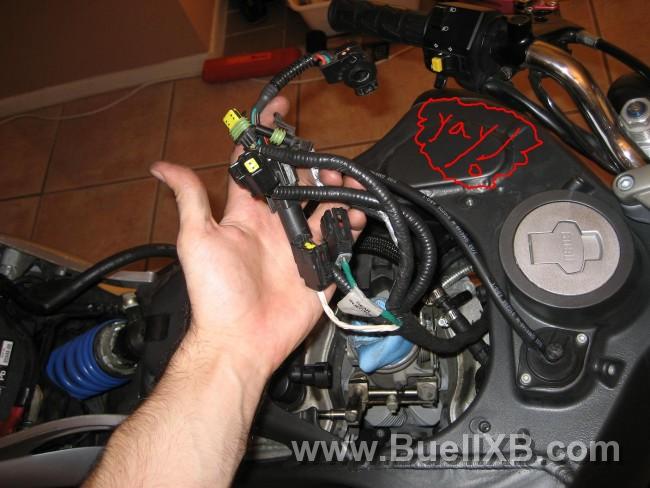
Everything on the top end should now be disconnected and you should be able to hold up something looking like this
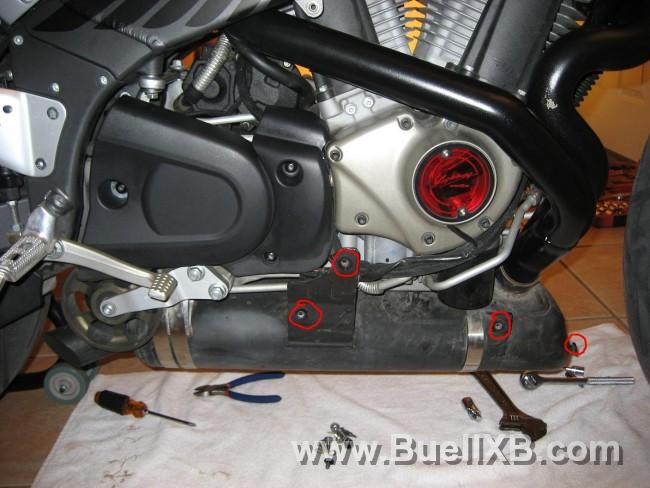
Remove the chin fairing (7 Bolts)
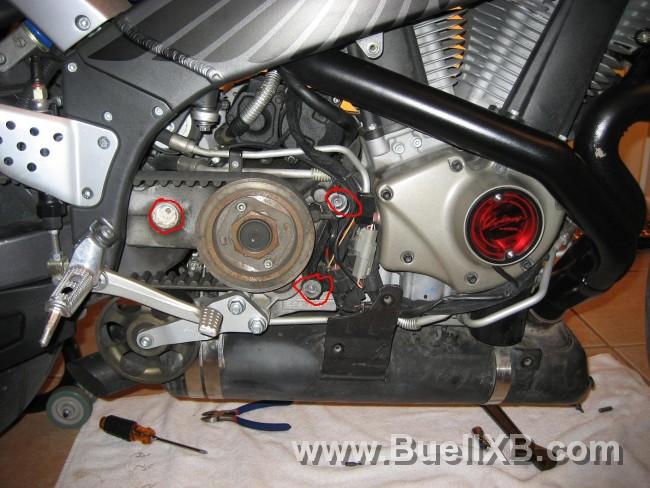
Remove the pulley cover (3 bolts)
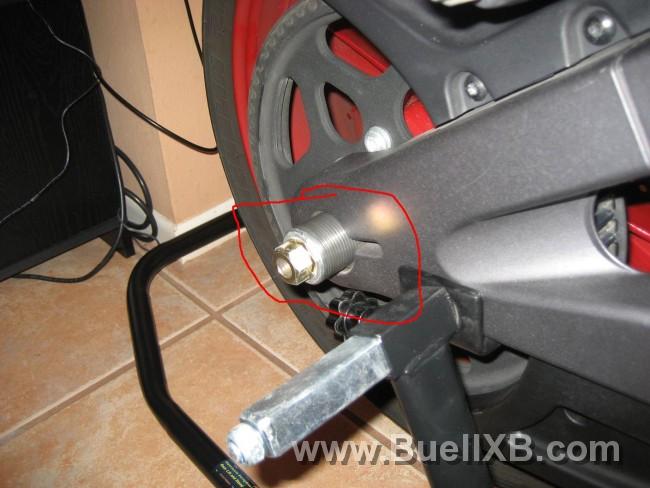
Lossen pinch bolt and then loosen rear axle 15 turns to give slack to the belt.
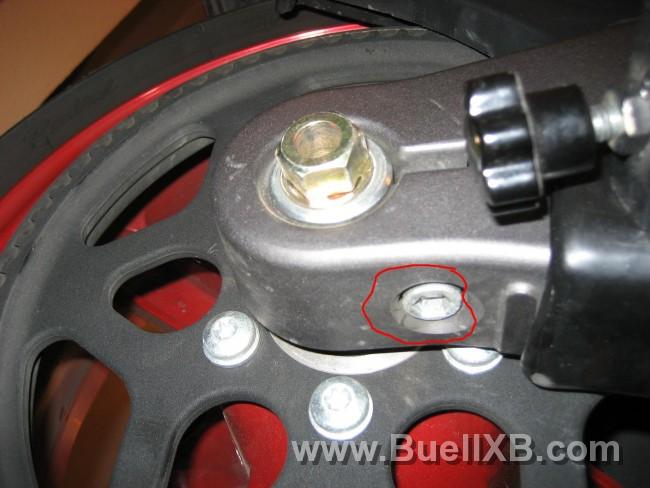
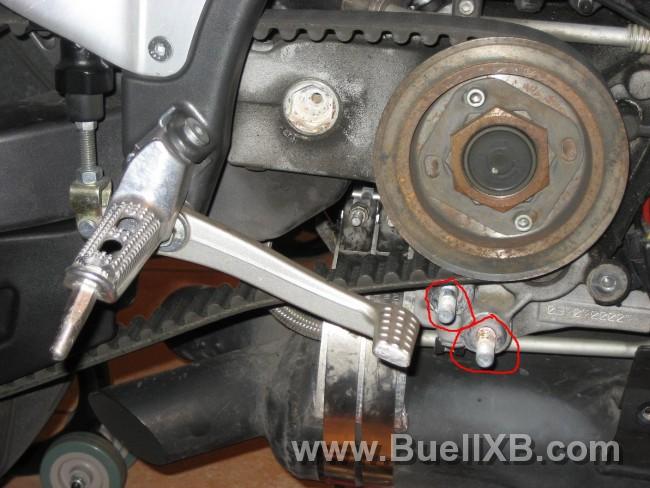
Remove belt tensioner (2 bolts)
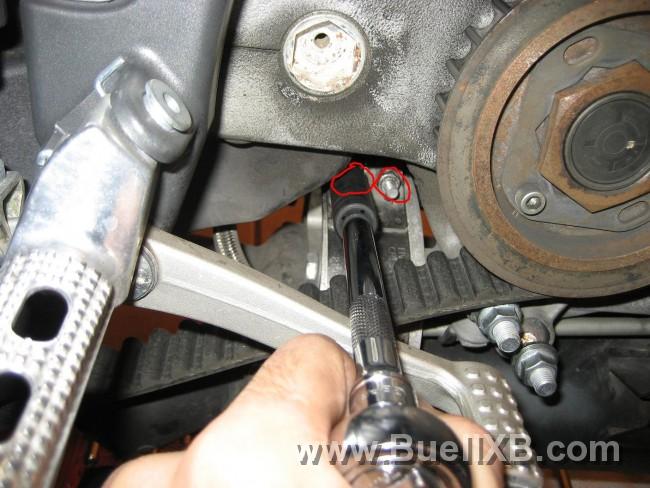
Remove rear bands holding the exhaust
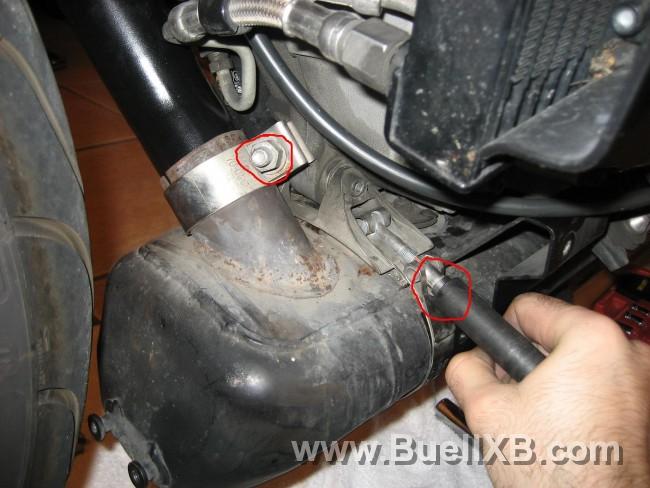
Remove front band holding exhaust and loosen the torca clamp holding the exhaust to the header
Remove the muffler and then remove the front muffler mount (1 bolt)
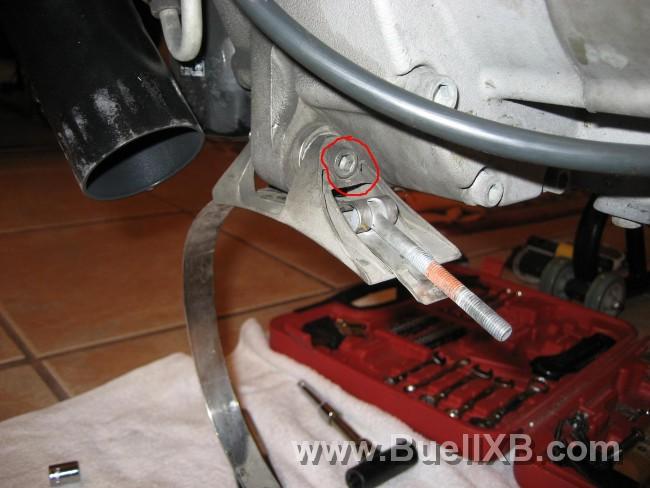
Remove left foot peg mount (3 bolts)
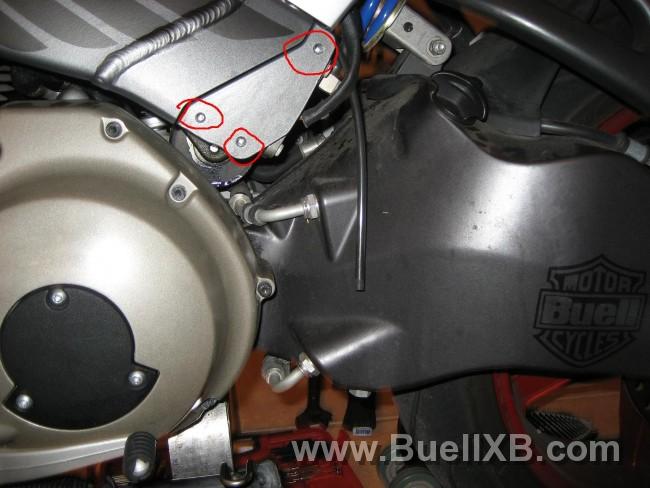
Disconnect the clutch cable. I did this by just removing the clutch lever.
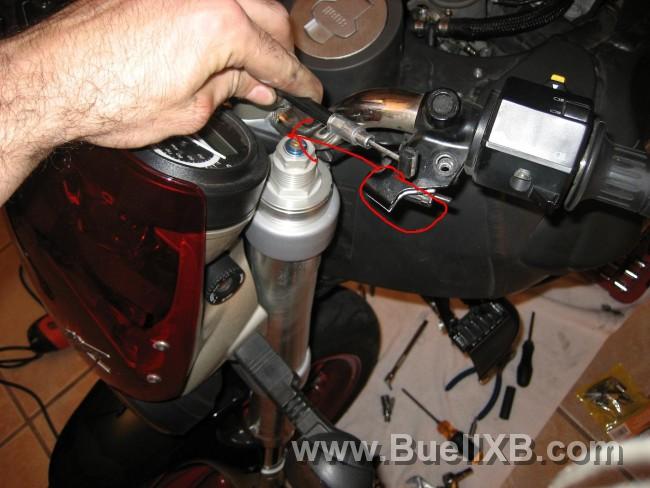
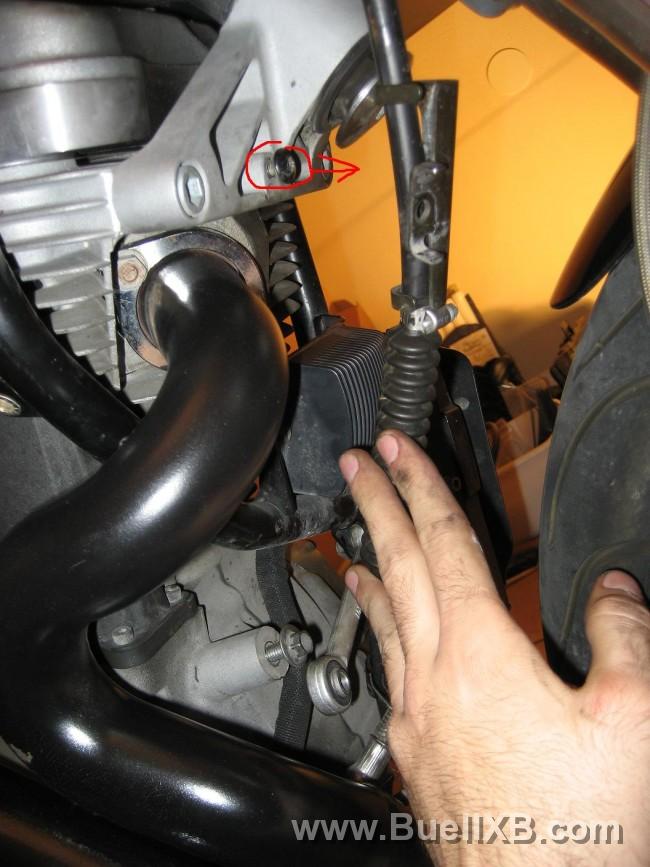
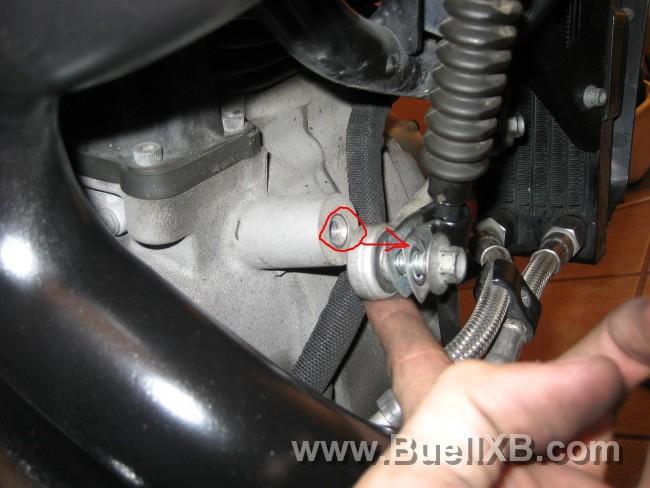
Support the engine with a jack at this point.
Disconnect rear isolator bar from the frame (1 bolt)
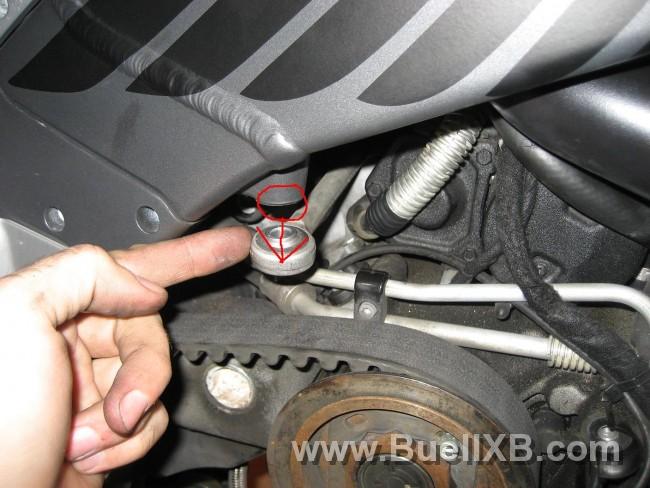
Disconnect the center tie bar (2 bolts)
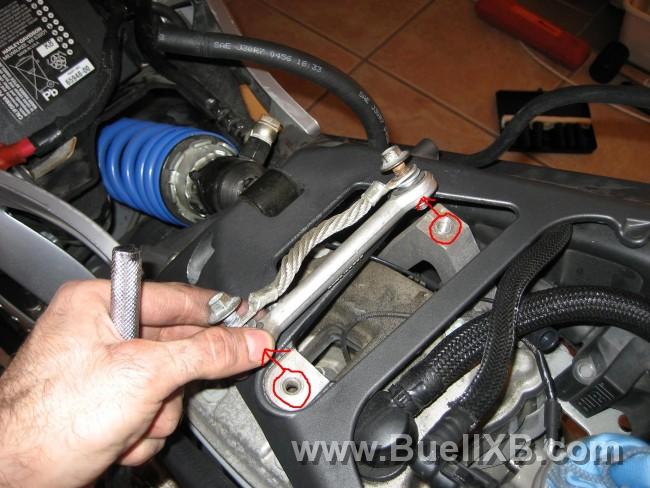
Disconnect the "V" Bracket (3 bolts)
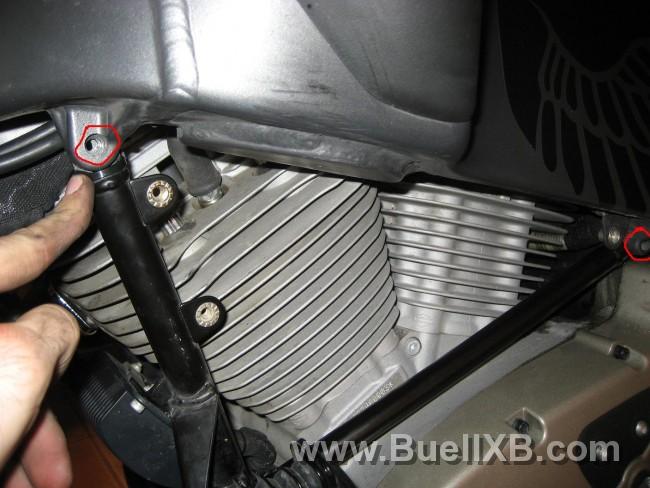
Remove the front isolator bolt. Make sure your jack is supporting the engine. After the initial turn of the bolt, you should be able to back it out by hand if you have it aligned properly. To do a full rotation you would also remove the isolator mount, but just for installing headers, it is not necessary.
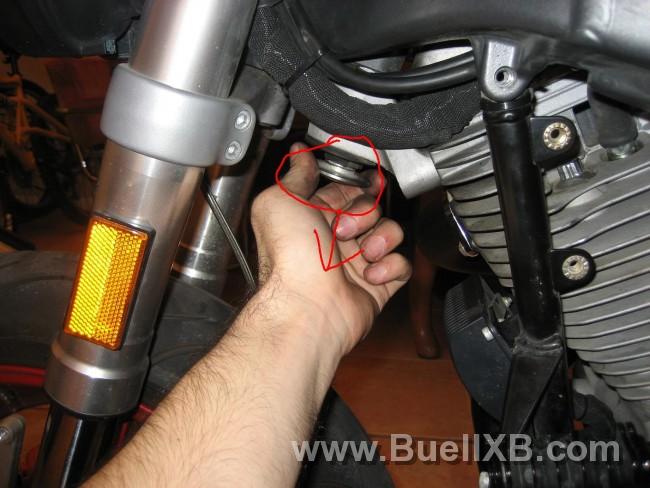
Slowly rotate the engine down, watching to make sure nothing is catching on anything.
Put your bike on a stand in a comfortable area with good lighting. A dining room works particularly well.

Unplug the connector for the fuel pump located behind the left rider foot peg. Then start the bike and let it run out of fuel. "This step is always performed in order to purge fuel lines" according to the service manual.

Remove the seat and disconnect the battery.

Remove the outer airbox, and inner airbox.
Remove the air filter base. (4 bolts) Remember to unplug the sensor at the bottom of the base before pulling it all the way off. The velocity stack is pushed down through the base as you pull it up.


Remove the velocity stack. I find using a strong zip tie works well to pull the spring together.

Cover the induction module

Disconnect the Temperatue and Oxygen sensors

Disconnect the coil

Remove the bolts holding the coil (2 bolts)

Disconnect the Throttle position sensor (2 bolts)

Disconnect the fuel line

Remove the right hand side scoop (3 bolts)

Remove the left hand side scoop (3 bolts)

Disconnect the fuel injector leads. It is easiest to reach up from the bottom to disconnect these.


Everything on the top end should now be disconnected and you should be able to hold up something looking like this

Remove the chin fairing (7 Bolts)

Remove the pulley cover (3 bolts)

Lossen pinch bolt and then loosen rear axle 15 turns to give slack to the belt.


Remove belt tensioner (2 bolts)

Remove rear bands holding the exhaust

Remove front band holding exhaust and loosen the torca clamp holding the exhaust to the header

Remove the muffler and then remove the front muffler mount (1 bolt)

Remove left foot peg mount (3 bolts)

Disconnect the clutch cable. I did this by just removing the clutch lever.


Support the engine with a jack at this point.
Disconnect rear isolator bar from the frame (1 bolt)

Disconnect the center tie bar (2 bolts)

Disconnect the "V" Bracket (3 bolts)

Remove the front isolator bolt. Make sure your jack is supporting the engine. After the initial turn of the bolt, you should be able to back it out by hand if you have it aligned properly. To do a full rotation you would also remove the isolator mount, but just for installing headers, it is not necessary.

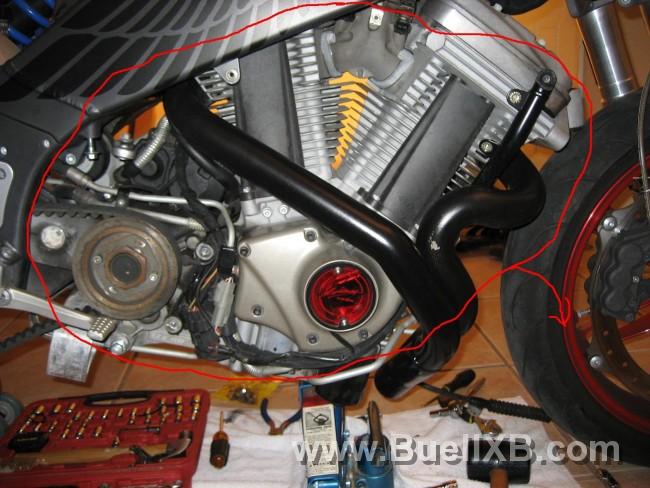
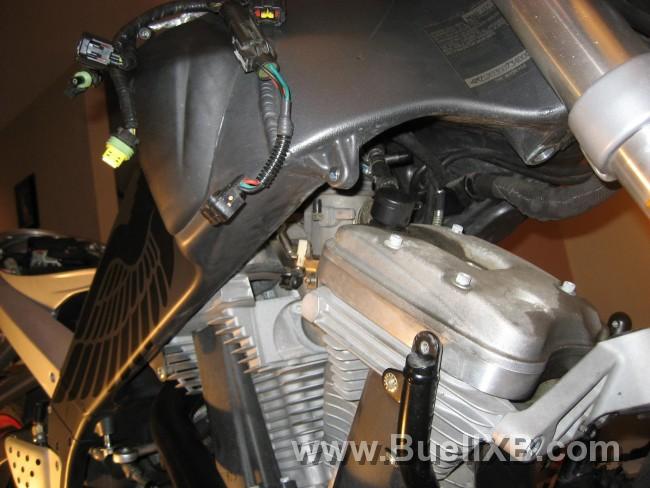
Slowly rotate the engine down, watching to make sure nothing is catching on anything.


